Blog

  • Tabata Training: The 4-Minute Workout That Delivers Real Results

    Tabata Training: The 4-Minute Workout That Delivers Real Results

    You have four minutes. Seriously — that might be all it takes to change your fitness trajectory.

    Introduction

    Most people assume that getting fitter requires hours at the gym each week. Yet one of the most research-validated workout protocols in exercise science clocks in at exactly four minutes per round. That protocol is Tabata training — and if you have not tried it yet, you are likely leaving serious cardiovascular and metabolic gains on the table.

    Tabata training is a highly structured form of high-intensity interval training (HIIT) built on a precise ratio: 20 seconds of maximum effort followed by 10 seconds of rest, repeated eight times. It sounds almost too simple. But the physiological response it triggers is anything but.

    Whether you are new to structured exercise or already active and looking for a time-efficient way to push your fitness forward, this guide breaks down everything you need to know — the science, the structure, the common mistakes, and how to build a Tabata practice that actually fits your life.

    Why Tabata Training Matters More Than You Think

    In a world where time is the number one barrier to consistent exercise, Tabata training offers something genuinely valuable: a protocol that research shows can develop both aerobic and anaerobic fitness simultaneously — something traditional steady-state cardio simply cannot do at the same efficiency level.

    The original research behind Tabata training was published in the journal Medicine & Science in Sports & Exercise in 1996 by Dr. Izumi Tabata and colleagues at the National Institute of Fitness and Sports in Japan. That landmark study compared two groups: one performing moderate-intensity steady-state cardio five days per week, and another following the Tabata protocol four days per week plus one day of moderate cardio. After six weeks, the Tabata group showed a 28% improvement in anaerobic capacity — a metric the steady-state group showed virtually no improvement in — along with comparable gains in aerobic capacity (VO2 max).

    The American College of Sports Medicine (ACSM) recognizes high-intensity interval training, including Tabata-style protocols, as one of the top fitness trends among adults — and for good reason. This approach trains your cardiovascular system, your fast-twitch muscle fibers, and your metabolic efficiency all in one session.

    For busy adults aged 25 to 60, this matters a great deal. You do not need to sacrifice your lunch break or morning routine to get meaningful results. One to three Tabata rounds — totaling as little as four to twelve minutes of actual work — can form the core of a highly effective workout when done correctly.

    The Science Behind How Tabata Actually Works

    Understanding what happens inside your body during a Tabata session helps explain why the format works — and why doing it halfway undermines everything.

    During those 20-second all-out intervals, your body rapidly depletes its available phosphocreatine stores and shifts into anaerobic glycolysis to keep producing energy. Oxygen demand spikes dramatically. Your heart rate climbs into zone 4 or 5 — typically 85 to 95% of maximum — within the first few rounds. The 10-second rest periods are deliberately too short for full recovery, which means each successive interval starts with an already-taxed system.

    This accumulated oxygen debt creates what researchers refer to as excess post-exercise oxygen consumption (EPOC) — the elevated metabolic state your body maintains for hours after the workout as it works to restore homeostasis. Harvard Health Publishing notes that HIIT-style workouts produce a meaningfully higher EPOC response than moderate-intensity exercise, which means your body continues burning energy at an elevated rate well after you stop moving.

    One common myth worth busting: many people believe Tabata training is only for elite athletes or younger adults. That is not supported by the evidence. A 2013 review in the Journal of Physiology confirmed that high-intensity interval protocols produce significant cardiovascular and metabolic adaptations across a wide range of fitness levels and ages — including adults over 50 — when properly scaled to individual capacity.

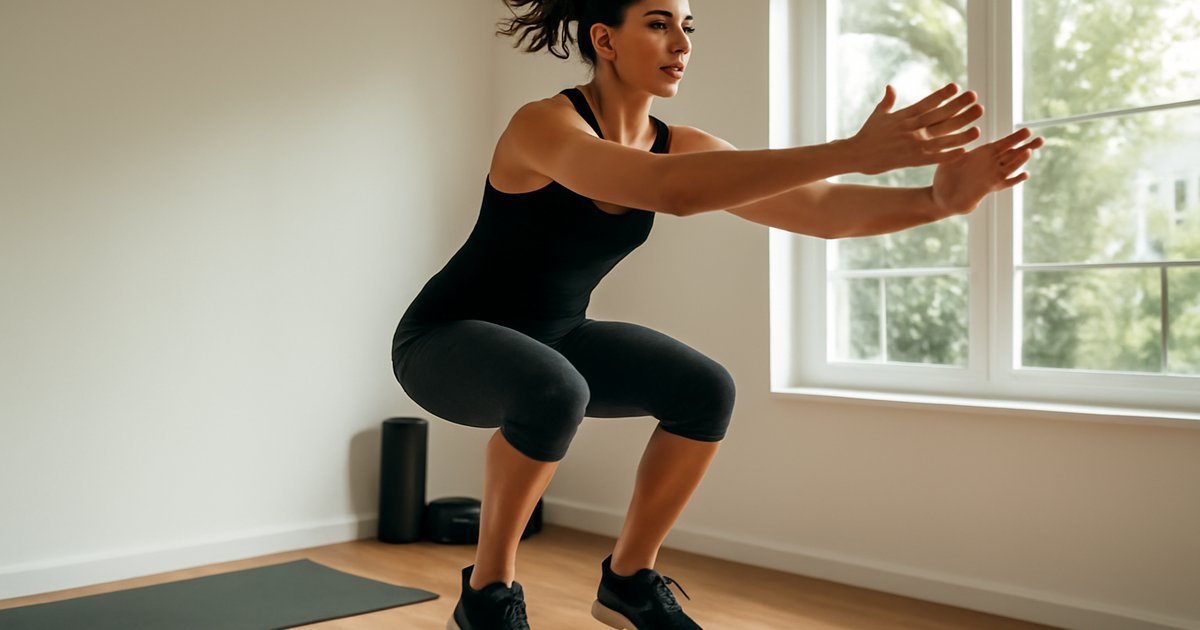
    The key word there is "scaled." True Tabata demands maximum effort. But "maximum" is relative to you — your current fitness baseline, your joint health, your experience level. A beginner doing modified squats at their personal maximum is executing legitimate Tabata training. An advanced athlete sprinting at full speed is doing the same thing.

    How to Get Started: Structure, Exercises, and Progression

    The structure of every Tabata block is non-negotiable: 20 seconds on, 10 seconds off, eight rounds, four minutes total. What changes is what you do during those 20 seconds — and how many blocks you chain together.

    Step 1 — Choose your timer app or device. A reliable interval timer is essential. Apps like Tabata Timer or Seconds Pro allow you to set the exact 20/10 split so you are not guessing.

    Step 2 — Pick your exercises based on your level:

    Beginner options (low-impact, joint-friendly):

    • Bodyweight squats
    • Modified push-ups (from knees)
    • Step touches or low-impact jumping jacks
    • Standing mountain climbers
    • Glute bridges

    Intermediate options:

    • Jump squats
    • Standard push-ups
    • Mountain climbers
    • Burpees (no push-up variation)
    • Alternating reverse lunges

    Advanced options:

    • Full burpees
    • Tuck jumps
    • Sprint intervals (treadmill or outdoor)
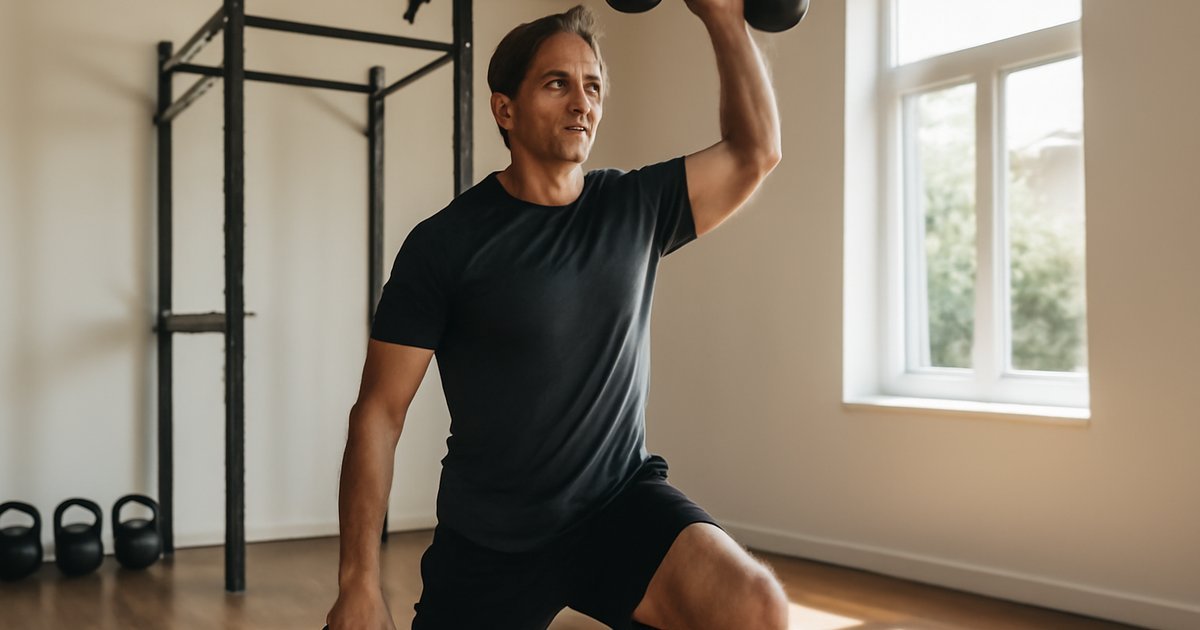
    • Kettlebell swings
    • Box jumps

    Step 3 — Warm up properly. Never start a Tabata block cold. Spend five to seven minutes on dynamic movements — leg swings, arm circles, bodyweight squats, light jogging — to raise your core temperature and prepare your joints.

    Step 4 — Begin with one block per session. Four minutes of true maximum effort is genuinely challenging. New practitioners often underestimate this. Start with one complete Tabata block, followed by two to three minutes of rest, then assess how you feel. As your conditioning improves over two to four weeks, add a second or third block with different exercises.

    Step 5 — Cool down intentionally. After your final block, walk slowly for three to five minutes and follow up with static stretching. This helps bring heart rate down safely and supports recovery. For a structured cooldown approach, check out our guide on foam rolling for recovery and performance — it pairs exceptionally well with Tabata sessions.

    Common Mistakes That Sabotage Your Tabata Results

    Tabata looks simple on paper. In practice, there are several easy-to-make errors that either reduce its effectiveness or increase injury risk. Here are the most common ones — and how to fix them.

    Mistake #1 — Not working at true maximum effort. This is the most widespread Tabata error. If you can easily hold a conversation during your 20-second interval, you are not in a true Tabata protocol — you are doing regular interval training. The protocol only delivers its full benefit when you push to your personal maximum. Fix this by choosing exercises that genuinely challenge you, and mentally commit to leaving nothing in the tank during each round.

    Mistake #2 — Skipping the warm-up. Jumping into explosive movements with cold muscles and joints is a reliable path to injury. A proper five- to seven-minute dynamic warm-up is not optional — it is part of the workout. Fix this by treating the warm-up as non-negotiable, especially for exercises like jump squats, burpees, or sprint intervals.

    Mistake #3 — Doing Tabata every day. Because Tabata sessions are short, many people assume they can do them daily. This is a significant recovery mistake. The ACSM recommends at least 48 hours of recovery between high-intensity sessions. Overdoing it leads to accumulated fatigue, performance decline, and elevated injury risk. Fix this by limiting true Tabata sessions to two to three times per week and filling other days with moderate activity, mobility work, or active recovery.

    Mistake #4 — Using poor form at high speed. Moving fast with bad technique — particularly on squats, lunges, and burpees — compounds stress on the knees, lower back, and hips. Fix this by mastering the movement pattern at a moderate pace before bringing Tabata intensity to it. If form breaks down during a 20-second interval, slow down slightly rather than sacrificing your body position.

    Mistake #5 — Neglecting nutrition before and after. Tabata training depletes glycogen stores rapidly. Training fasted on a regular basis without adaptation can compromise performance and recovery. Fix this by having a light, carbohydrate-containing snack one to two hours before intense sessions — a banana, oatmeal, or whole-grain toast — and a protein-containing meal or snack within 30 to 60 minutes after.

    What to Eat to Support Tabata Training

    Tabata’s intensity means your nutritional support matters more than it might for a gentle yoga session or a casual walk. This does not mean complicated meal plans — it means being intentional about a few key nutrients.

    Carbohydrates for fuel: The USDA Dietary Guidelines for Americans recommend that carbohydrates make up 45 to 65% of total daily calories for active adults. For Tabata specifically, complex carbohydrates — oats, sweet potatoes, quinoa, brown rice, whole-grain bread — provide the glycogen your muscles rely on during those explosive intervals. A portion of roughly one-quarter to one-half cup of cooked whole grains as part of a pre-workout meal is a solid practical target.

    Protein for recovery: The Academy of Nutrition and Dietetics recommends 1.2 to 2.0 grams of protein per kilogram of body weight per day for adults engaged in regular intense exercise. After a Tabata session, prioritize a protein source within the hour — Greek yogurt, eggs, cottage cheese, chicken, legumes, or a quality protein shake. This supports muscle repair and adaptation.

    Hydration: The ACSM recommends drinking 17 to 20 ounces of water two hours before exercise, and continuing to hydrate during and after the session. High-intensity training increases sweat rate significantly. If your session runs longer than 45 minutes in total, consider adding electrolytes — particularly sodium and potassium — to your post-workout hydration.

    What to moderate: Avoid heavy meals within 90 minutes of a Tabata session. High-fat, high-fiber meals slow gastric emptying and can cause real GI discomfort when you are performing explosive movements. Save those hearty meals for after your session.

    How Long Until You See Results — and What to Track

    Tabata results vary significantly depending on your starting fitness level, consistency, sleep quality, nutrition, and recovery habits. That said, research offers useful general benchmarks.

    The original Tabata study showed measurable improvements in both aerobic and anaerobic capacity within six weeks. For beginners, noticeable cardiovascular improvements — reduced breathlessness, faster heart rate recovery — often appear within three to four weeks of consistent twice-weekly training.

    Metrics worth tracking:

    • Resting heart rate: As cardiovascular fitness improves, resting heart rate typically decreases. Check it first thing in the morning before getting out of bed.
    • Recovery time: How quickly does your heart rate return to normal after a block? Faster recovery signals improving fitness.
    • Rep count per interval: Track how many reps of your chosen exercise you complete in 20 seconds. Increasing output over time is a direct measure of progress.
    • Perceived exertion: Using the Borg Rating of Perceived Exertion scale, your effort during Tabata should feel like an 8 or 9 out of 10. If it starts feeling like a 6, it is time to progress your exercise selection.

    If you are not seeing any changes after eight weeks of consistent, properly executed sessions, consider consulting a certified personal trainer or your primary care provider. Underlying factors — hormonal imbalances, sleep deficits, nutritional gaps — can blunt training adaptations and may warrant professional evaluation.

    Frequently Asked Questions About Tabata Training

    Is Tabata training safe for beginners?
    Yes, when properly scaled. Beginners should start with low-impact exercise options and focus on movement quality before cranking up the intensity. One block of four minutes is a completely appropriate starting point. If you have cardiovascular conditions, joint issues, or have been sedentary for a long time, check with your healthcare provider before starting any high-intensity program.

    Can Tabata training help with weight management?
    Tabata can be a meaningful part of a weight management strategy, primarily through its calorie-burning effect and EPOC response. However, exercise alone rarely drives significant fat loss without corresponding attention to nutrition and overall lifestyle. Think of it as one important piece of the puzzle, not a standalone solution.

    How is Tabata different from regular HIIT?
    Tabata is technically a subset of HIIT, but with a very specific and demanding work-to-rest ratio of 20 seconds on and 10 seconds off. Most general HIIT protocols use longer rest periods — often a 1:2 or 1:3 work-to-rest ratio — which allows for more recovery between intervals. Tabata’s compressed rest makes it more demanding and creates a stronger anaerobic stimulus.

    Can I combine Tabata with other training styles?
    Absolutely. Many people use Tabata blocks as a conditioning finisher after strength training, or pair them with mobility work on alternating days. If you are already doing dumbbell training or bodyweight training, adding one to two Tabata sessions per week can meaningfully elevate your cardiovascular conditioning without requiring additional gym time.

    Do I need equipment for Tabata training?
    No. Some of the most effective Tabata workouts use only your bodyweight — squats, push-ups, mountain climbers, burpees. Equipment like kettlebells, jump ropes, or a treadmill can add variety and intensity, but they are not requirements to get real results from the protocol.

    Your Next Step Starts in Four Minutes

    Tabata training is not a gimmick or a shortcut. It is a scientifically validated protocol that respects your time while demanding your honest effort. Four minutes might not sound like much — until you have done eight rounds of jump squats at true maximum intensity and you understand exactly why Dr. Tabata’s research made waves in the fitness world when it was first published.

    Start with one block. Master the timing. Choose an exercise you can perform safely and explosively. Give it everything for 20 seconds. Rest for 10. Repeat eight times. That is it.

    Do that consistently — two to three times per week — for six weeks, and you will likely understand firsthand why so many fitness professionals continue to recommend this decades-old protocol. Small, consistent effort always outperforms the perfect plan that never gets executed. Today, four minutes is all you need to begin.


    Wellness Disclaimer: This article is for informational and educational purposes only. The content is not intended to replace professional medical, nutritional, or fitness advice. Always consult a qualified healthcare provider, registered dietitian, or certified fitness professional before starting a new health program or making significant changes to your lifestyle.

    Content reviewed by our wellness editorial team, with references to peer-reviewed research and guidelines from leading health organizations.
  • Barre Workout: Build Strength, Flexibility & Lean Muscle

    Barre Workout: Build Strength, Flexibility & Lean Muscle

    Barre Workout: Build Strength, Flexibility & Lean Muscle

    It looks like ballet class — but the results are anything but delicate.

    Picture this: you’re standing at a ballet barre, legs slightly turned out, doing what looks like the tiniest pulse imaginable. Thirty seconds in, your thighs are on fire. A minute later, you’re shaking. And somehow, by the end of the 55-minute class, you feel both completely spent and surprisingly calm.

    That’s the barre workout effect — and it’s been quietly building one of the most loyal fitness followings in adult wellness. Unlike high-impact workouts that leave your joints aching, or heavy lifting sessions that demand long recovery windows, barre training sits in a uniquely effective middle ground. It builds real strength, improves flexibility, sharpens posture, and creates a deep connection between your mind and your muscles.

    If you’ve been curious about barre but assumed it was only for former dancers or younger women, this guide is going to change your mind. We’ll break down what barre actually is, what the science says about its benefits, how to get started safely, and what to realistically expect — no leotard required.

    Why Barre Workout Matters More Than You Think

    Barre training isn’t just a trend. It’s a thoughtfully designed system that addresses several fitness gaps that most adults face — especially those in the 30-to-60 age range.

    Here’s the reality: as we age, we don’t just lose muscle — we lose the smaller stabilizing muscles that support our joints, posture, and movement efficiency. Standard gym routines often neglect these deep muscle groups entirely. Barre, by contrast, directly targets them through isometric holds, small-range movements, and high-repetition sequences that require sustained muscular tension.

    Research published in the Journal of Strength and Conditioning Research has shown that isometric exercise — holding a muscle under tension without changing its length — significantly improves both muscular endurance and joint stability. Barre classes are built around this principle. Every tucked pulse, held plié, and sustained arabesque position is essentially an isometric training stimulus.

    Beyond muscle, barre is notably kind to your joints. The American College of Sports Medicine (ACSM) recommends low-impact exercise as a foundational element of adult fitness programs, particularly for those managing early-stage joint discomfort, bone density concerns, or returning from injury. Barre fits this profile precisely.

    And perhaps most importantly for busy adults: a single barre session addresses strength, flexibility, balance, and mental focus all at once. That’s serious efficiency.

    The Science Behind How Barre Actually Works

    Let’s clear something up right away: barre is not "just stretching" and it’s not a watered-down yoga class. It’s a serious training modality with a distinct physiological mechanism.

    The core science behind barre rests on three principles: muscular fatigue through high repetition, time under tension via isometric holds, and proprioceptive training — your body’s ability to sense its own position in space.

    During a typical barre sequence, you might perform 30 to 60 small pulsing reps at a partial range of motion, immediately followed by a static hold. This combination keeps the target muscle contracted for an extended period, creating deep metabolic fatigue without heavy load. This is why you shake. That trembling isn’t weakness — it’s your muscle fibers being recruited to their limit.

    A common myth is that barre only tones without building strength. That’s not accurate. A study in the Journal of Dance Medicine and Science found that regular barre participants showed measurable improvements in muscular endurance, postural alignment, and hip flexor strength over an 8-week period. These are real, functional gains.

    Barre also involves significant core activation throughout every movement. Maintaining proper form at the barre — neutral pelvis, engaged abdominals, lifted chest — requires continuous deep core work that transfers directly to better posture and reduced lower back discomfort in daily life.

    One more thing: the mind-muscle connection required in barre training is genuinely demanding. You’re not just moving — you’re cueing your body to isolate very specific muscles, which research suggests enhances neuromuscular efficiency over time.

    How to Get Started with Barre Training

    The good news: you don’t need ballet experience, extreme flexibility, or any special equipment to begin. Barre is genuinely beginner-friendly when approached correctly.

    What you actually need:

    • Grip socks (non-negotiable — they prevent slipping on smooth floors)
    • A sturdy chair or countertop if you’re working at home
    • Comfortable workout attire that allows full range of motion
    • Optional: a light set of 1-3 lb hand weights for upper body sequences

    Beginner entry point (weeks 1-3):

    1. Start with 2 sessions per week, 30-45 minutes each
    2. Focus on learning proper form over completing every rep — poor form defeats the purpose
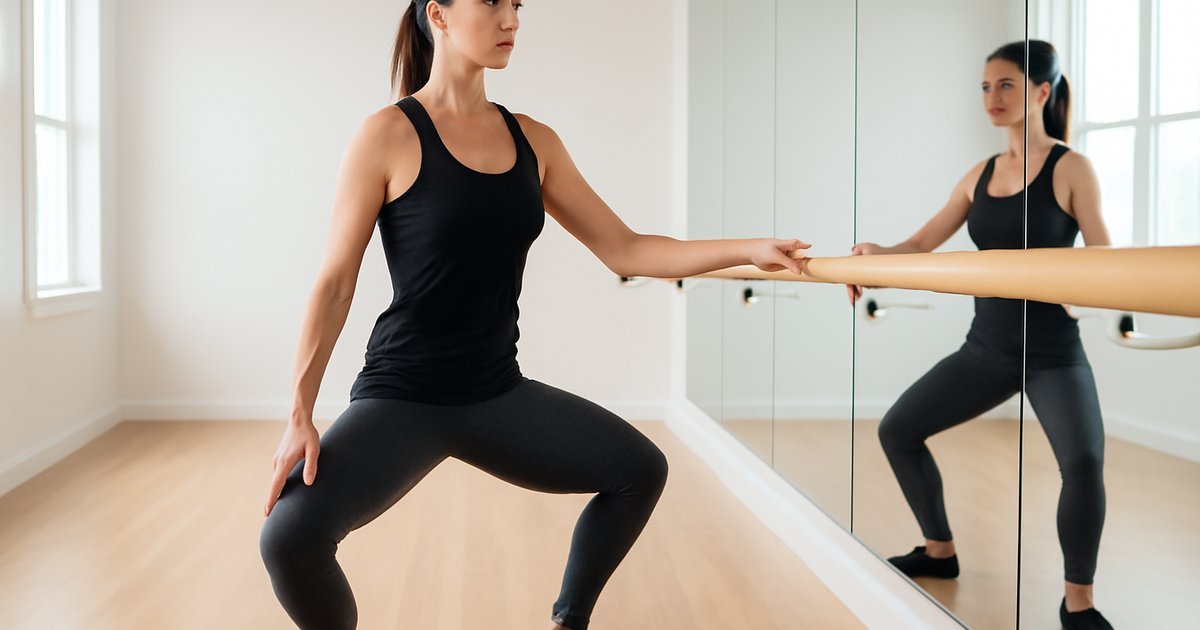
    3. Common beginner sequences: parallel first position squats (plié), standing seat work (glute isolation), forearm plank holds, and upper body work with light weights
    4. Expect muscle soreness in places you haven’t felt before — inner thighs, outer hips, and the seat
    5. Use a mirror if possible to check your alignment

    Intermediate progression (weeks 4-8):

    1. Increase to 3-4 sessions per week
    2. Introduce turned-out positions (first, second position) for added hip external rotator engagement
    3. Add ankle weights (1-2 lbs) to standing leg work
    4. Incorporate floor barre sequences for deeper abdominal and hip work
    5. Pair with one foam rolling session per week for muscle recovery

    Advanced options (beyond 8 weeks):

    • Barre fusion formats that layer in cardio bursts between sequences
    • Adding resistance bands for progressive overload in lower body work
    • Exploring online platform barre programs with structured progression (popular options include The Ness, Barre3, and Pure Barre On Demand)

    Common Mistakes That Sabotage Your Barre Results

    Barre looks deceptively simple — small movements, light or no weights, graceful music. That visual ease is exactly why people make the same handful of mistakes that limit their progress.

    Mistake 1: Rushing through the movements
    Barre’s effectiveness depends entirely on controlled, intentional movement with sustained muscle tension. Speeding through pulsing sequences to "get them done" dissipates the muscular load and dramatically reduces the training stimulus. Fix it: slow down by at least 30%, and focus on squeezing the target muscle through every rep.

    Mistake 2: Gripping the barre too hard
    The barre is a balance tool, not a weight-bearing support. Death-gripping it allows you to cheat the core and hip stabilizers that should be doing the work. Fix it: use just your fingertips for light balance support, keeping your shoulders relaxed and your core engaged.

    Mistake 3: Skipping the stretching segments
    Many beginners treat the stretching portions of class as optional cool-down time. In barre training, those deep static stretches between muscle groups are crucial — they restore muscle length after intense isometric holds and accelerate recovery. Research from the American Council on Exercise confirms that post-exercise static stretching meaningfully reduces delayed-onset muscle soreness. Don’t skip it.

    Mistake 4: Ignoring neutral spine
    A tucked pelvis is a barre cue — but only in specific exercises. Many beginners tuck their pelvis during every movement, which strains the lower back and limits glute activation. Fix it: understand when your instructor calls for a "tuck" versus maintaining a neutral spine, and ask for clarification when in doubt.

    Mistake 5: Expecting instant lean-out results
    Barre improves muscle tone, posture, and endurance — but it is not primarily a fat-loss tool when used alone. This depends on your baseline activity level, nutrition, and frequency. Fix it: pair barre with adequate protein intake and complement it with a cardio modality like incline walking for more comprehensive body composition results.

    What to Eat to Support Your Barre Training

    Barre creates significant muscular demand — especially in smaller stabilizing muscles that aren’t often trained. Supporting that work nutritionally makes a tangible difference in recovery and performance.

    Protein is non-negotiable. The Academy of Nutrition and Dietetics recommends that active adults consume 1.2 to 1.7 grams of protein per kilogram of body weight daily to support muscle repair and development. For a 150-pound adult, that’s roughly 82-115 grams of protein per day. Good sources for barre practitioners: Greek yogurt, eggs, chicken breast, salmon, edamame, cottage cheese, and legumes.

    Pre-class fueling: Eat a small, easily digestible snack 60-90 minutes before class. A banana with almond butter, a small portion of oatmeal with berries, or a hard-boiled egg with a few whole grain crackers works well. Avoid heavy meals — barre requires deep core engagement that heavy digestion actively interferes with.

    Post-class recovery: Within 30-60 minutes after class, consume a meal or snack that combines protein and complex carbohydrates. This supports glycogen replenishment and muscle tissue repair. A smoothie with Greek yogurt, fruit, and a handful of spinach is a simple, effective option.

    Hydration: Barre classes often feel less sweaty than cardio workouts, but you’re still losing fluids. The USDA Dietary Guidelines recommend women consume approximately 2.7 liters (91 oz) and men 3.7 liters (125 oz) of total water daily. Aim for 16-20 oz of water before class and consistent hydration throughout your day.

    Anti-inflammatory foods: Given the isometric muscular demand of barre, incorporating anti-inflammatory foods can support recovery. Think fatty fish (omega-3s), leafy greens, berries, turmeric, and extra-virgin olive oil — all aligned with recommendations from Harvard Health Publishing.

    How Long Until You See Results from Barre?

    Real talk: barre results are real, but they follow a specific timeline that requires patience and consistency.

    Weeks 1-2: You’ll feel results before you see them. Expect significant muscle soreness (especially inner thighs, glutes, and outer hips), improved body awareness, and possibly better posture-consciousness throughout your day.

    Weeks 3-4: Muscle endurance begins to adapt. Sequences that made you shake and tap out early will become more manageable. Balance improves noticeably. Core stability gains become apparent in how you carry yourself.

    Weeks 6-8: This is when visible postural changes typically emerge — straighter spine, more lifted chest, leaner appearance through the torso and seat. Functional strength improvements translate to everyday tasks.

    3+ months: Consistent practitioners commonly report significant improvements in hip mobility, reduced lower back tension, improved overall body composition (results vary significantly based on nutrition and total activity level), and enhanced balance.

    What to track:

    • How long you can hold specific isometric positions before form breaks (a direct endurance marker)
    • Posture changes using side-profile photos monthly
    • Flexibility benchmarks (can you touch your toes? How far?)
    • Subjective energy levels and lower back comfort ratings

    If you’ve been consistent for 10+ weeks without any progress, it’s worth consulting a certified fitness professional to review your form, frequency, and nutritional habits.

    Frequently Asked Questions About Barre Workouts

    Is barre good for weight loss?
    Barre can contribute to weight management as part of a comprehensive approach that includes adequate nutrition and cardiovascular activity. On its own, a typical 55-minute barre class burns approximately 250-400 calories depending on intensity, body composition, and effort level. It’s most effective for improving body composition — particularly muscle tone and posture — rather than rapid weight loss.

    Can men do barre workouts?
    Absolutely. Barre’s benefits — joint stability, core strength, muscular endurance, flexibility, and postural correction — are equally valuable for men. Many male athletes, particularly runners and cyclists, incorporate barre to address hip flexibility and stabilizer muscle deficits. The cultural association with women is a branding artifact, not a physiological reality.

    How does barre compare to Pilates?
    Both share an emphasis on core engagement, controlled movement, and muscular endurance. The key differences: barre is performed standing at a ballet barre with more lower body emphasis and higher rep sequences, while Pilates is primarily mat or reformer-based with a stronger focus on spinal alignment and deep stabilizer work. Many adults benefit from combining both. If you want to explore Pilates further, our complete Pilates guide for adults covers the fundamentals in detail.

    Is barre safe if I have knee or hip issues?
    Barre is generally considered low-impact and joint-friendly, but this depends on your specific condition. Many movements can be modified for knee sensitivity — for example, avoiding deep plié positions and limiting turned-out stances. Always consult your physician or physical therapist before starting if you have a diagnosed joint condition. Let your instructor know about any limitations so they can offer appropriate modifications.

    How often should I do barre to see results?
    Most certified barre instructors and fitness professionals recommend 3-4 sessions per week for optimal results. Fewer than 2 sessions weekly limits adaptation; more than 5 sessions without rest risks overtraining the stabilizing muscles. Results vary significantly based on baseline fitness, nutrition, age, and consistency.

    Your Next Step Starts at the Barre

    Barre training occupies a rare space in the fitness world: it’s accessible enough for true beginners, effective enough for serious athletes, and sustainable enough to actually stick with long-term. That combination is harder to find than it sounds.

    The research supports it. The real-world results speak clearly. And the low injury risk makes it one of the most sensible training additions for adults navigating the realities of aging joints, busy schedules, and the genuine need for both strength and flexibility.

    You don’t need to be graceful. You don’t need experience. You just need grip socks, a chair or countertop, and the willingness to shake a little. Start with two sessions this week — that’s your one action for today. Your body will thank you in ways you didn’t expect.


    Wellness Disclaimer: This article is for informational and educational purposes only. The content is not intended to replace professional medical, nutritional, or fitness advice. Always consult a qualified healthcare provider, registered dietitian, or certified fitness professional before starting a new health program or making significant changes to your lifestyle.

    Content reviewed by our wellness editorial team, with references to peer-reviewed research and guidelines from leading health organizations.
  • Foam Rolling: The Recovery Tool You’re Probably Underusing

    Foam Rolling: The Recovery Tool You’re Probably Underusing

    You finish a hard workout, your muscles are tight, and you walk past the foam roller in the corner — again. Here’s why that might be costing you more than you think.

    Why Foam Rolling Matters More Than You Think

    Most people treat foam rolling like a warm-up afterthought or something they do when a muscle is already screaming. But the evidence tells a more compelling story: consistent foam rolling — done correctly — can meaningfully improve how your body moves, recovers, and performs over time.

    A 2015 review published in the Journal of Athletic Training found that foam rolling after exercise significantly reduced delayed-onset muscle soreness (DOMS) and helped maintain muscle performance in the 24 to 72 hours following intense training. That’s not a minor detail — that’s the difference between a productive training week and a frustrating one spent limping around.

    For adults between 25 and 60 who are juggling work, family, and fitness, recovery isn’t a luxury. It’s what makes your effort sustainable. And foam rolling is one of the most accessible, low-cost tools you can use to support it.

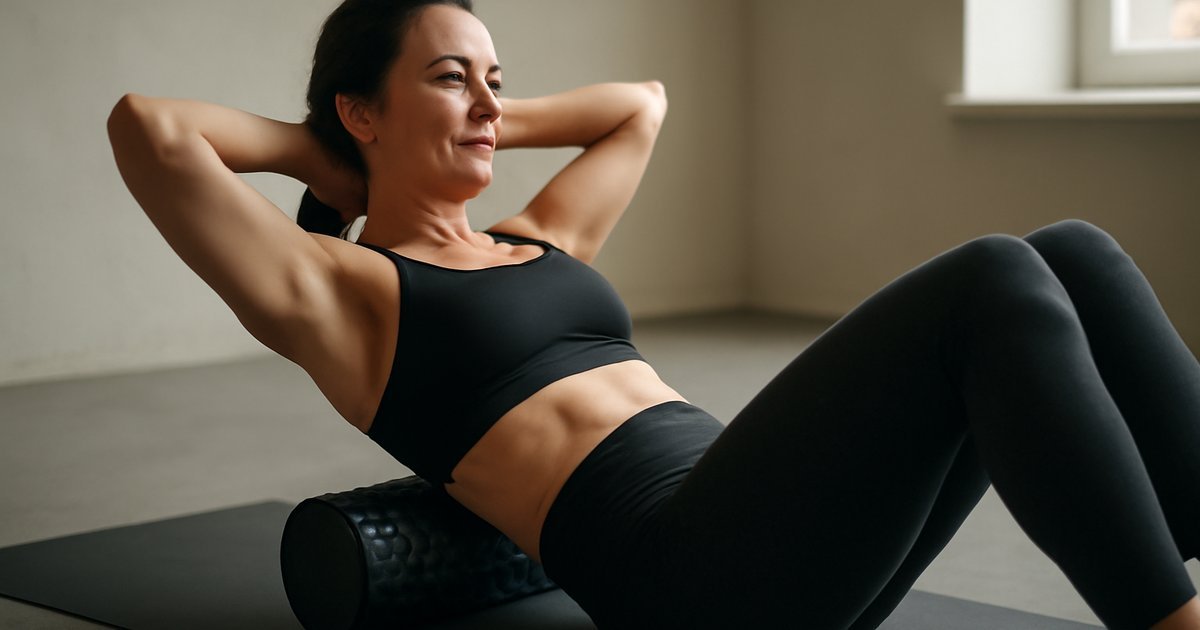
    Think of foam rolling — technically called self-myofascial release (SMR) — as a way to hydrate and mobilize the connective tissue (fascia) that wraps around your muscles. When that tissue gets stiff, sticky, or restricted from sitting too long, training hard, or just everyday stress, your movement suffers. Foam rolling helps restore suppleness to that tissue so your muscles can work the way they’re supposed to.

    According to the American College of Sports Medicine (ACSM), SMR techniques like foam rolling are considered a valid complementary practice for improving flexibility and reducing muscle tension when used consistently. That said, results vary depending on technique, frequency, and individual muscle health — which is exactly what this guide will walk you through.

    The Science Behind How Foam Rolling Actually Works

    There’s a lot of half-baked advice floating around about foam rolling — including the idea that you’re “breaking up scar tissue” or “releasing lactic acid.” Let’s set the record straight.

    Your fascia is a web of connective tissue that surrounds every muscle, bone, nerve, and organ in your body. When it becomes restricted — from inactivity, repetitive movement patterns, or training stress — it can limit your range of motion and contribute to pain or tightness. Foam rolling applies sustained mechanical pressure to the tissue, which appears to stimulate the nervous system and alter the viscoelastic properties of the fascia itself.

    In other words, you’re not breaking anything up. You’re likely triggering a neurological response that tells the muscle to relax, and you’re applying pressure that temporarily changes the hydration and stiffness of the fascial tissue.

    A study published in the Journal of Sports Sciences (2017) found that foam rolling increased range of motion without reducing muscle performance — a key distinction, since static stretching before exercise has been shown to temporarily reduce strength and power output. This makes foam rolling particularly useful as part of a warm-up: it loosens tissue without dulling your muscles before you need them.

    Another common myth: harder pressure always means better results. Research suggests moderate pressure — uncomfortable but not painful — is most effective. Aggressive rolling that causes you to tense up may actually counteract the relaxation response you’re trying to achieve.

    Foam rolling also appears to support circulation and lymphatic flow in the rolled areas, which can contribute to the flushing of metabolic byproducts after exercise. Harvard Health Publishing notes that improved local blood flow plays a role in tissue repair, making post-workout rolling a genuinely practical recovery strategy.

    How to Get Started: Practical Foam Rolling Steps

    Whether you’ve never touched a foam roller or you use one occasionally, here’s a clear, progressive approach to building this habit into your routine.

    Beginner Level

    1. Choose the right roller. Start with a smooth, medium-density roller (not the aggressive textured kind). It gives enough feedback without overwhelming tight tissue.
    2. Target major muscle groups first. Begin with calves, hamstrings, quads, IT band, and upper back. These are the areas most people carry tension in from daily sitting and basic exercise.
    3. Spend 30 to 60 seconds per area. Slowly roll until you find a tender spot, pause on it for 20 to 30 seconds, breathe through the pressure, then move on.
    4. Roll 3 to 4 times per week to start — post-workout or in the evening is ideal for beginners focused on recovery.

    Intermediate Level

    • Add the piriformis (glutes), hip flexors, and thoracic spine (mid-back) — common problem areas for desk workers and runners.
    • Incorporate foam rolling before workouts as well, focusing on the areas you’re about to train. Keep pre-workout sessions under 90 seconds per muscle group.
    • Experiment with denser or textured rollers as your tissue adapts and initial soreness decreases.

    Advanced Level

    • Use targeted tools like lacrosse balls for smaller areas (plantar fascia, pecs, neck base).
    • Combine foam rolling with active movement: pause on a tender spot, then slowly flex and extend the joint to increase the neurological effect.
    • Integrate SMR into both your warm-up and cool-down on heavy training days.

    If you’re looking for complementary low-impact movement practices to pair with foam rolling, Pilates for Adults: Build Strength, Flexibility & Balance is an excellent pairing — both target tissue quality and movement efficiency.

    Common Foam Rolling Mistakes That Sabotage Results

    Foam rolling looks simple — and in many ways, it is. But there are a few patterns that consistently prevent people from getting the most out of it.

    Mistake 1: Rolling Too Fast

    Speed-rolling over your entire leg in 30 seconds doesn’t give your nervous system time to respond. The neurological relaxation effect that makes foam rolling work requires sustained pressure — at least 20 to 30 seconds on a tender point. Slow down. Find the spot. Breathe into it.

    Mistake 2: Rolling the Wrong Areas

    Rolling directly on a joint (like your knee or lower back) is a common and potentially harmful error. You should roll the muscles above and below the knee, not the joint itself. The lower back is also generally not recommended for direct rolling — the lumbar spine lacks the muscular padding of the upper back, and rolling it can increase rather than decrease tension. Target the glutes and thoracic spine instead.

    Mistake 3: Doing It Only When You’re Injured or Sore

    This is the equivalent of only drinking water when you’re already dehydrated. Foam rolling works best as a consistent practice, not a crisis response. Tissue that’s regularly mobilized responds better to training and is less likely to develop chronic tightness. Build it into your weekly routine before you need it.

    Mistake 4: Using Too Much Pressure Too Soon

    If you’re grimacing and holding your breath, the pressure is probably too much. Pain triggers muscular guarding — the opposite of what you want. Start lighter, especially on areas like the IT band or calves, and gradually increase pressure as your tissue adapts over weeks.

    Mistake 5: Ignoring the Upper Body

    Most people only roll their legs. But the thoracic spine, chest, shoulders, and lats accumulate significant tension — especially for anyone who trains their upper body or works at a desk. Rolling these areas can dramatically improve posture and shoulder mobility.

    What to Pair With Foam Rolling for Best Results

    Foam rolling works best as part of a broader recovery and mobility strategy, not as a standalone fix. Here’s what the evidence supports pairing with it:

    • Dynamic stretching (post-roll): After rolling a muscle, a light dynamic stretch of that area can extend the range-of-motion benefits. The ACSM recommends dynamic stretching over static stretching for pre-exercise preparation.
    • Adequate hydration: Fascia is largely water-based tissue. Rolling works better when you’re well-hydrated. The National Academies of Medicine recommends roughly 3.7 liters of total water intake daily for men and 2.7 liters for women — from food and fluids combined.
    • Quality sleep: The National Sleep Foundation notes that growth hormone — critical for muscle repair — is primarily released during deep sleep. No recovery tool replaces consistent, quality rest.
    • Anti-inflammatory nutrition: Foods rich in omega-3 fatty acids, antioxidants, and polyphenols support the repair of exercised tissue. Think fatty fish, berries, leafy greens, and turmeric. The Academy of Nutrition and Dietetics supports anti-inflammatory eating patterns as part of an active lifestyle.

    If you want to explore complementary cardio that keeps inflammation low, Incline Walking: The Low-Impact Workout That Actually Works is worth reading — it’s one of the most recovery-friendly training modalities available.

    How Long Until You See Results — and What to Track

    Managing expectations here is important. Foam rolling is not a dramatic intervention — it’s a cumulative one.

    Most people notice a reduction in post-workout soreness within the first one to two weeks of consistent use. Improved range of motion in problem areas (tight hip flexors, stiff thoracic spine) typically becomes apparent within three to four weeks of rolling three or more times per week.

    The Journal of Athletic Training review mentioned earlier showed measurable DOMS reduction within 48 to 72 hours of a single foam rolling session — but the performance and flexibility benefits are cumulative and require consistent practice over time.

    Here’s what to track:

    • Morning stiffness: How stiff are you when you get out of bed? This should gradually decrease over weeks of consistent rolling.
    • Range of motion checkpoints: Can you touch your toes more easily? Does your overhead press feel less restricted? These are practical markers.
    • Recovery quality: Are you ready to train again faster? Less DOMS after hard sessions is a reliable signal.
    • Pain patterns: Chronic tightness in specific areas (IT band, upper traps, calves) that gradually reduces over time.

    If you’ve been rolling consistently for six weeks and see no improvement in a specific area, consider seeing a licensed physical therapist. Some restrictions require hands-on assessment and targeted intervention beyond what self-myofascial release can address.

    For those pairing foam rolling with a dumbbell-based strength program, Dumbbell Training: The Complete Guide for Adults offers a structured approach that complements this recovery practice well.

    Frequently Asked Questions About Foam Rolling

    Is foam rolling the same as a massage?

    Not exactly, but there are meaningful overlaps. Both apply pressure to soft tissue and can trigger a relaxation response in the muscle. The difference is that a trained massage therapist can identify and address specific restrictions with much greater precision. Foam rolling is a practical, everyday self-care tool — not a replacement for therapeutic bodywork when it’s needed.

    Can I foam roll every day?

    Yes, for most people daily foam rolling is safe and beneficial. Unlike heavy strength training, it doesn’t break down tissue in a way that requires recovery days. Many athletes and active adults roll daily as part of their morning or evening routine. If you experience increased soreness or discomfort from daily rolling, reduce frequency and pressure.

    Should I foam roll before or after exercise?

    Both have value, and the research supports using it at either end of a session. Pre-workout rolling (under 90 seconds per area) helps prepare tissue without reducing muscle performance. Post-workout rolling (up to 2 minutes per area) is more focused on recovery and reducing DOMS. Many people benefit most from including both — brief rolling before and more focused rolling after.

    Does foam rolling actually break up scar tissue?

    This is a persistent myth. Foam rolling does not break up scar tissue or “adhesions” in any clinically proven way. What it does do is stimulate a neurological response that encourages muscle relaxation and temporarily alters the stiffness of fascial tissue. The effect is real and useful — it’s just different from what many people believe is happening.

    Which foam roller should I buy?

    For beginners, a smooth, medium-density roller (standard 6-inch diameter) is the best starting point. Once your tissue adapts — usually after four to six weeks — you can explore textured or higher-density options. Vibrating foam rollers have shown some promise in research for acute pain relief, but the evidence isn’t strong enough to justify the higher cost for most people starting out.

    Your Next Step Starts on the Floor

    Foam rolling won’t transform your fitness overnight — but done consistently, it can meaningfully change how your body feels and performs day to day. Less morning stiffness, faster recovery between sessions, better range of motion, and fewer nagging aches are all realistic outcomes for someone who makes this a regular habit.

    You don’t need to commit to a 30-minute rolling routine. Start with five to ten minutes three times a week, focusing on the areas that feel tightest or that you train most. Stay consistent, roll slowly, and pay attention to how your body responds over time.

    The foam roller in the corner of your gym or living room is one of the simplest, most underused tools in your wellness toolkit. Today is a good day to stop walking past it.


    Wellness Disclaimer: This article is for informational and educational purposes only. The content is not intended to replace professional medical, nutritional, or fitness advice. Always consult a qualified healthcare provider, registered dietitian, or certified fitness professional before starting a new health program or making significant changes to your lifestyle.

    Content reviewed by our wellness editorial team, with references to peer-reviewed research and guidelines from leading health organizations.
  • Jump Rope Training: The Complete Fitness Guide for Adults

    Jump Rope Training: The Complete Fitness Guide for Adults

    Jump Rope Training: The Complete Fitness Guide for Adults

    You don’t need a gym, a trainer, or a lot of time — just a rope and a few square feet of space.

    Here’s a number that might surprise you: a 150-pound adult burns roughly 400 calories in just 30 minutes of moderate jump rope training. That’s more than jogging at a steady pace, and it fits in your driveway, your garage, or even a hotel room. Yet for most adults, the jump rope hasn’t left the childhood playground — and that’s a serious missed opportunity.

    Jump rope training has quietly become one of the most efficient, research-supported forms of cardiovascular and full-body conditioning available. It builds coordination, improves heart health, strengthens the lower legs and core, and demands just enough mental focus to make the time fly by. Whether you’re coming back from a fitness break, looking for a travel-friendly workout, or simply bored with your current cardio routine, jump rope training deserves a serious look.

    This guide covers everything — the science, the benefits, how to start safely, the most common mistakes, and realistic timelines for seeing results. By the end, you’ll know exactly how to make the jump rope work for your fitness level and your life.

    Why Jump Rope Training Matters More Than You Think

    Most adults default to treadmills, ellipticals, or group fitness classes when they think about cardio. Jump rope barely registers — and that’s a gap worth closing.

    According to the American College of Sports Medicine (ACSM), adults should aim for at least 150 minutes of moderate-intensity aerobic activity per week, or 75 minutes of vigorous-intensity exercise. Jump rope can satisfy both standards depending on your pace — at a moderate skip, it counts as vigorous-intensity cardio, which means you can meet your weekly targets in less total time.

    Beyond calorie burn, jump rope training offers a rare combination of cardiovascular conditioning and neuromuscular training. Every jump requires your brain to coordinate timing, balance, and rhythm — which means you’re training your nervous system at the same time you’re elevating your heart rate. A 2019 study published in the Journal of Sports Science and Medicine found that 10 weeks of jump rope training significantly improved cardiovascular fitness and motor coordination in untrained young adults compared to a control group that did no jump rope work.

    For adults aged 25 to 60, this matters in practical terms: better coordination translates to fewer falls, faster reaction times, and more confident movement in daily life. It’s cardio with a cognitive bonus you won’t get from a stationary bike.

    How Jump Rope Training Actually Works

    The mechanics of jump rope are deceptively simple — but what’s happening inside your body is anything but.

    Each jump activates your calves, quads, glutes, hamstrings, and core stabilizers. Your shoulders and forearms are engaged to rotate the rope. The repeated, rhythmic impact loading — light but consistent — stimulates bone density in the lower legs, which is a significant benefit as adults age and bone mass naturally declines. The National Institutes of Health (NIH) notes that weight-bearing aerobic exercise is one of the most effective strategies for maintaining and building bone density in adults.

    Myth to bust: Many people assume jump rope is only for boxers, kids, or elite athletes. In reality, it’s one of the most scalable forms of exercise available. You control the speed, the duration, and the complexity. A 55-year-old beginner can start with 30-second intervals at a slow pace and get significant cardiovascular benefit — no box jumps or double-unders required.

    The rope style matters more than people realize. A basic PVC speed rope (lightweight, fast-moving) is best for beginners focused on cardio and rhythm. A weighted jump rope (typically 1 to 2 pounds) adds resistance for upper body conditioning. Beaded ropes are slower and more forgiving for learning form. Most adults should start with a lightweight speed rope with adjustable length.

    As for impact concerns: jump rope has a lower ground-reaction force per step than running, especially when proper technique is used (landing softly on the balls of your feet, not flat-footed). Harvard Health Publishing notes that proper jump rope form places less cumulative stress on the joints than many assume — though it is still a higher-impact activity than walking or cycling, so individual joint health matters.

    How to Get Started with Jump Rope Training

    The barrier to entry is low, but starting smart makes all the difference between sticking with it and quitting after three sessions with sore shins.

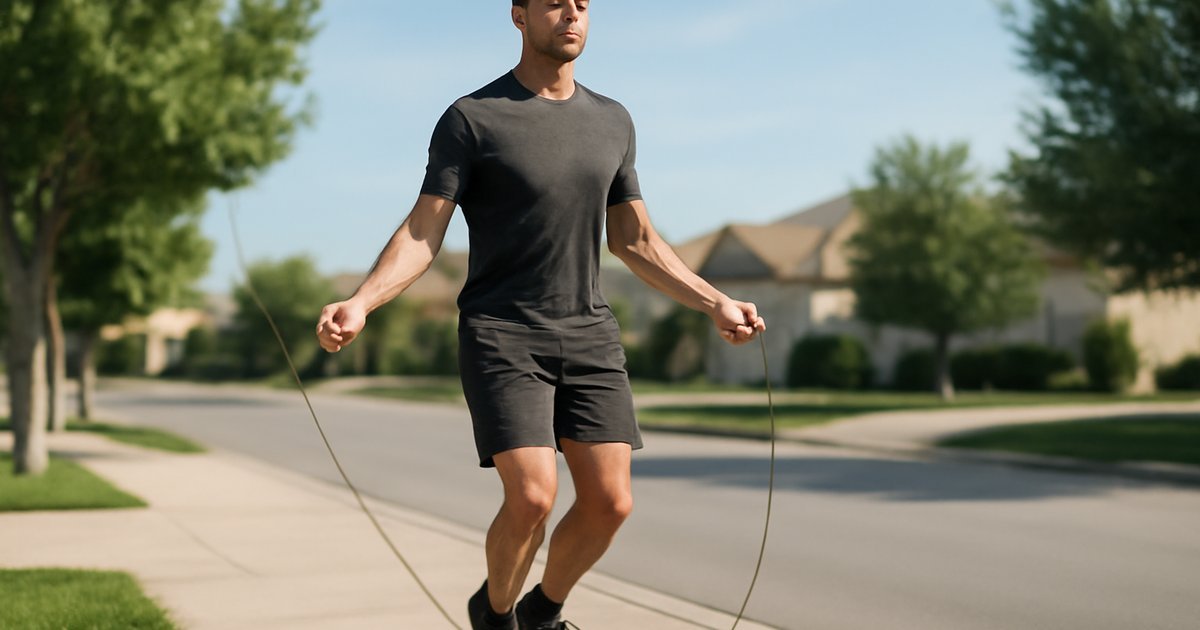
    Step 1: Size your rope correctly. Stand on the middle of the rope and pull the handles up — they should reach your armpits. Too long, and the rope drags; too short, and you’ll trip constantly.

    Step 2: Master the basic bounce first. Before adding the rope, practice jumping in place with a light, rhythmic bounce — landing softly on the balls of your feet, knees slightly bent. This trains your landing mechanics and saves your knees. Once that feels comfortable (usually within one or two sessions), add the rope.

    Step 3: Start with interval structure — not time-based continuous jumping.

    • Beginner: 20 seconds jumping, 40 seconds rest — repeat 6 to 8 times. Do this 3 times per week.
    • Intermediate: 30 seconds on, 30 seconds off — repeat 10 to 12 times. Add a second set after week 2.
    • Advanced: Tabata-style rounds (20 seconds maximum effort, 10 seconds rest, 8 rounds), or skill-based progressions like alternating feet, high knees, or double-unders.

    Step 4: Choose your surface wisely. A rubber mat, wooden floor, or asphalt works well. Avoid carpet (rope catches) and concrete without cushioning (hard on joints over time). Wear supportive cross-training shoes — not running shoes, which have too much heel drop for this type of lateral and ball-of-foot loading.

    Step 5: Integrate jump rope into your existing routine. It works well as a warm-up (5 minutes before lifting), a finisher (10 minutes after strength training), or a standalone cardio session. If you’re looking for a low-impact alternative on active recovery days, consider pairing it with incline walking for a gentler cardio complement.

    Common Mistakes That Sabotage Your Jump Rope Progress

    Jump rope looks simple — and that simplicity is exactly why people make avoidable errors that lead to frustration or injury.

    Mistake 1: Jumping too high. This is the most universal beginner error. You only need to clear the rope by one to two inches. Jumping high wastes energy, increases landing impact, and breaks your rhythm. Focus on a quick, compact bounce — the rope should pass underneath with barely any clearance.

    Mistake 2: Using your whole arm to swing the rope. The rotation should come from your wrists and forearms, not your shoulders. Big arm movements slow you down and tire you out fast. Keep your elbows close to your sides and let your wrists do the work. This takes deliberate practice but becomes automatic within a few sessions.

    Mistake 3: Skipping the rest intervals. If you can’t keep your rhythm and form, you’re not getting the training benefit — you’re just tripping and recovering. Structured intervals with full rest periods are more effective than grinding through poor form. It’s tempting to push through, but the rest period is where adaptation happens.

    Mistake 4: Landing flat-footed or with stiff knees. Landing on flat feet or with locked knees dramatically increases joint stress. Practice landing softly on the balls of your feet with a slight bend in the knees to absorb impact. Think of your calves as shock absorbers — they should feel fatigued, not your knees.

    Mistake 5: Doing too much too soon. Jump rope is genuinely demanding. Shin splints and calf soreness are common in the first two weeks if volume is ramped too fast. The American College of Sports Medicine recommends increasing training volume by no more than 10% per week to allow the tendons and bones of the lower legs to adapt — especially if you’re coming from a sedentary baseline.

    What to Eat to Support Jump Rope Training

    Jump rope training is aerobic and anaerobic — especially when done in intervals — so your nutritional needs are different from purely strength-based training.

    Before your session: A light, carbohydrate-forward snack 30 to 60 minutes before training gives your muscles accessible fuel. The Academy of Nutrition and Dietetics recommends easily digestible options like a banana with a small amount of nut butter, a slice of whole-grain toast, or a small bowl of oatmeal. Avoid high-fat or high-fiber meals close to training, which can slow digestion and cause discomfort during impact exercise.

    Protein for recovery: Because jump rope activates multiple muscle groups — particularly the calves, core, and shoulders — adequate protein is essential for repair. Current guidelines from the Academy of Nutrition and Dietetics support a target of 1.2 to 1.6 grams of protein per kilogram of body weight daily for active adults. Good sources include eggs, Greek yogurt, chicken, fish, legumes, and cottage cheese.

    Hydration: Jump rope elevates your heart rate fast, and sweat loss adds up quickly. Drink 16 to 20 ounces of water 1 to 2 hours before training, and aim for 7 to 10 ounces every 10 to 20 minutes during longer sessions, according to ACSM hydration guidelines.

    Post-workout carbohydrates: After intense intervals, replenishing glycogen supports recovery. A balanced meal with complex carbohydrates (sweet potato, brown rice, quinoa) and protein within 60 to 90 minutes post-exercise is a reliable and well-supported approach.

    Foods that may hinder performance: Heavy, fried, or highly processed foods eaten close to training can impair energy availability and increase GI discomfort during high-impact movement. Alcohol the night before also disrupts recovery quality and reduces the quality of next-day performance, even at moderate consumption levels.

    How Long Until You See Results

    Realistic timelines matter — because unrealistic expectations are one of the main reasons people quit a new fitness habit within the first month.

    Week 1 to 2: You’re learning motor patterns and conditioning your tendons. Don’t expect dramatic changes in how you look or feel — this phase is about neurological adaptation. Your cardiovascular system will begin responding immediately: your resting heart rate will start to become more efficient within 2 to 3 weeks of consistent training, according to research published in the Journal of Applied Physiology.

    Week 3 to 4: Coordination improves noticeably. Most beginners can complete longer unbroken sets and feel less winded during sessions. Calf endurance increases, and you may notice improved posture and lower-leg stability.

    Week 6 to 8: Measurable cardiovascular improvements are typical at this stage — VO2 max may begin to shift for previously untrained individuals. Some users notice body composition changes, particularly if training is paired with appropriate nutrition, though results vary significantly based on diet, baseline fitness, and frequency.

    What to track:

    • Resting heart rate (lower over time = improved cardiovascular fitness)
    • How long you can jump before needing rest (endurance marker)
    • Perceived exertion at a fixed pace (should feel easier as fitness improves)
    • Shin or joint discomfort (flag early to avoid overuse injury)

    If you’re not seeing progress after 8 weeks of consistent training (3+ sessions per week), consider consulting a certified personal trainer or fitness professional to assess your technique and programming. If you enjoy mixing modalities, bodyweight training and dumbbell training pair exceptionally well with jump rope for a balanced fitness program.

    Frequently Asked Questions

    Is jump rope training safe for people with knee problems?
    This depends entirely on the nature and severity of your knee condition. For many people with mild knee discomfort, the lower ground-reaction force of jump rope (compared to running) makes it tolerable when proper form — soft landing on the balls of the feet — is used. However, anyone with existing joint issues should consult an orthopedic specialist or physical therapist before starting. Never push through sharp or worsening pain.

    How many times a week should I do jump rope training?
    For most adults, 3 to 4 sessions per week is the evidence-supported sweet spot for building cardiovascular fitness without overloading the lower legs. Rest days between sessions allow tendons and muscles to recover. As conditioning improves, you can increase frequency or combine jump rope with other modalities.

    Can jump rope replace running for cardio?
    In many ways, yes — jump rope can provide equivalent or superior cardiovascular stimulus in less time, and some people find it more joint-friendly than pavement running. That said, running and jump rope work slightly different energy systems and muscle groups. Using both in rotation gives you variety and more complete conditioning. Results vary significantly based on your individual biomechanics.

    What’s the best jump rope for beginners?
    A lightweight PVC speed rope with adjustable handles and length is ideal for most beginners. Look for a rope in the $15 to $35 range from reputable fitness brands. Avoid heavy weighted ropes to start — they’re harder to time and can cause shoulder fatigue before your technique is established.

    Will jump rope help me lose weight?
    Jump rope burns a meaningful number of calories per session — especially during high-intensity intervals — and when combined with appropriate nutrition, it can support a calorie deficit that contributes to fat loss over time. However, no single exercise guarantees weight loss on its own. The Academy of Nutrition and Dietetics consistently emphasizes that sustainable weight management depends on the combination of dietary habits, physical activity, sleep, and stress management.

    Start Simple. Stay Consistent. Let the Rope Do the Work.

    Jump rope training is one of those rare fitness tools that delivers serious results without demanding a serious investment — of money, space, or time. Ten to twenty minutes, three times a week, done consistently over 8 to 12 weeks, can meaningfully shift your cardiovascular fitness, coordination, and lower-body strength.

    The best place to start isn’t with a perfect routine or expensive equipment. It’s with a sized rope, a soft surface, and a commitment to 20 seconds of jumping followed by rest. That’s it. From there, the progression is natural — your body adapts, your technique improves, and the sessions start to feel like something you look forward to rather than something you dread.

    Pick up a rope this week. Give it two weeks before you judge the results. Small, consistent steps always beat perfect plans that never get started.


    Wellness Disclaimer: This article is for informational and educational purposes only. The content is not intended to replace professional medical, nutritional, or fitness advice. Always consult a qualified healthcare provider, registered dietitian, or certified fitness professional before starting a new health program or making significant changes to your lifestyle.

    Author Note: Content reviewed by our wellness editorial team, with references to peer-reviewed research and guidelines from leading health organizations.
  • Incline Walking: The Low-Impact Workout That Actually Works

    Incline Walking: The Low-Impact Workout That Actually Works

    You don’t need to run to get a serious cardio workout — sometimes the smartest move is simply tilting the treadmill up a few degrees.

    Introduction

    Picture this: you’ve been jogging on the treadmill for weeks, your knees are starting to ache, and your motivation is quietly slipping away. You’re not alone. According to the American College of Sports Medicine, joint pain and injury are among the top reasons adults abandon consistent cardio routines — especially those over 35.

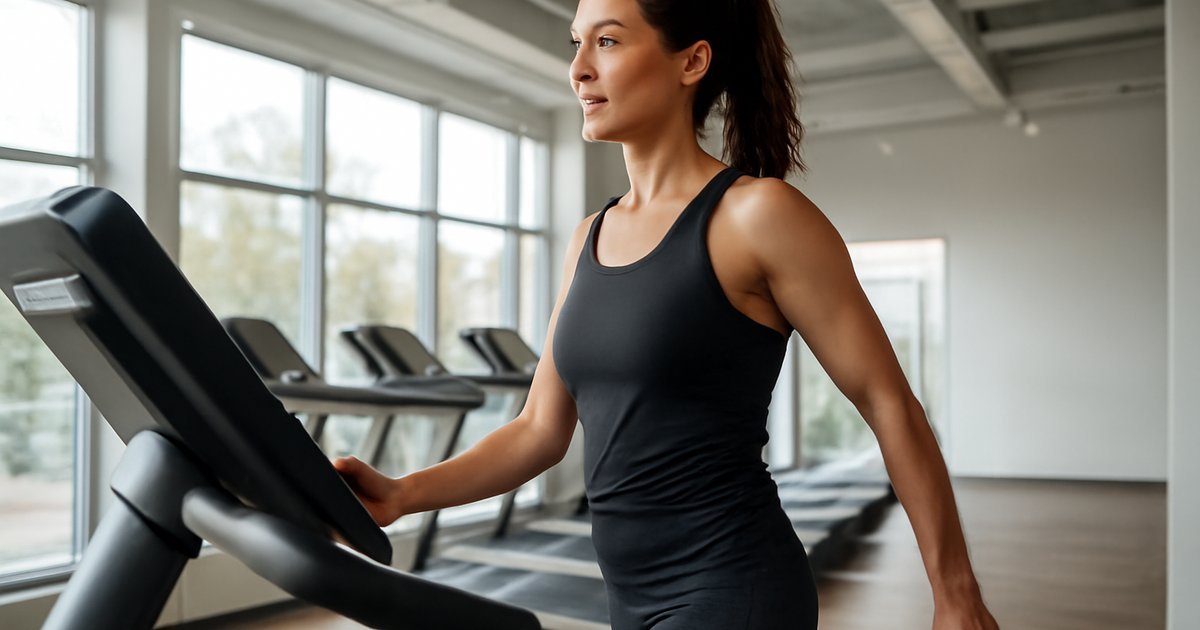
    Here’s what most people overlook: incline walking can deliver cardiovascular and muscular benefits comparable to running — with significantly less impact on your joints. And yet, it’s wildly underused at gyms across the country.

    Whether you’re stepping back into fitness after a break, managing knee or hip discomfort, or simply looking for a smarter way to burn calories and build endurance, incline walking might be exactly what your routine is missing. In this guide, you’ll get the science, the practical steps, common pitfalls, and realistic timelines — everything you need to make incline walking work for you.

    Why Incline Walking Matters More Than You Think

    Most people think of walking as the "easy" option — something you do when you’re not ready for "real" exercise. That thinking needs a serious update.

    Research published in the Journal of Sports Science and Medicine found that walking at a 9% incline increases caloric expenditure by up to 50% compared to walking on a flat surface at the same pace. That’s not a small difference — that’s the difference between a moderate stroll and a legitimate fat-burning session.

    Beyond calorie burn, incline walking places greater demand on your glutes, hamstrings, and calves than flat walking does. It also elevates your heart rate into a cardiovascular training zone without the high-impact pounding that running creates. For adults managing mild arthritis, recovering from injury, or simply carrying extra body weight, this distinction is critical.

    The American Heart Association recommends at least 150 minutes of moderate-intensity aerobic activity per week. Incline walking, when done consistently, comfortably qualifies as moderate intensity for most adults — making it one of the most accessible paths to hitting that target.

    The Science Behind Incline Walking and How It Actually Works

    When you add incline to your walk, your body has to work against gravity with every step. This engages your posterior chain — the glutes, hamstrings, and lower back — far more than level walking. Your cardiovascular system also has to work harder to deliver oxygen to those working muscles, which translates to a higher heart rate and greater energy expenditure at the same speed.

    A widely referenced study from the Journal of Biomechanics demonstrated that walking on a 10–15% incline significantly increases muscle activation in the gluteus maximus and hamstrings compared to flat surface walking. This makes incline walking one of the few low-impact exercises that effectively trains the posterior chain — a set of muscles essential for posture, injury prevention, and metabolic health.

    Common myth busted: Many people believe you need to walk fast on an incline to get results. In fact, a slower pace at a steeper grade is often more effective for muscle engagement and fat oxidation. Slowing down to 2.5–3.5 mph at a 10–15% incline keeps your body in the aerobic fat-burning zone while maximizing glute and hamstring activation. Speed is not the goal — sustained effort is.

    Harvard Health Publishing also notes that incline walking is particularly effective at engaging slow-twitch muscle fibers, which are the fatigue-resistant fibers critical for endurance and long-term metabolic efficiency. These are the same fibers targeted in Zone 2 cardio training — and incline walking is one of the simplest ways to reach that training zone without equipment beyond a treadmill.

    How to Get Started: Practical Steps for Every Level

    One of the best things about incline walking is that it meets you exactly where you are. Here’s how to start based on your current fitness level:

    Beginner (Weeks 1–3)

    • Set treadmill to 4–6% incline at 2.5–3.0 mph
    • Duration: 20–25 minutes, 3 times per week
    • Focus on controlled breathing and upright posture — don’t lean on the handrails
    • If 4% feels too easy after two sessions, bump up to 6%

    Intermediate (Weeks 4–8)

    • Increase incline to 8–12% at 3.0–3.5 mph
    • Duration: 30–40 minutes, 4 times per week
    • Try interval-style incline walking: 3 minutes at 12% incline, 2 minutes at 4% — repeat 5–6 times
    • Add light ankle weights (1–3 lbs) to increase muscular demand if cleared by your provider

    Advanced

    • Work up to 12–15% incline at 3.5–4.0 mph
    • Duration: 45–60 minutes, 4–5 times per week
    • Combine with dumbbell carries or weighted vest for full-body challenge
    • Track heart rate to ensure you’re staying in the 60–75% max heart rate zone for fat-burning endurance

    If you prefer outdoor walking, hills work just as well. Scout a route with sustained uphill sections of at least 5–10 minutes. Outdoor incline walking also engages stabilizer muscles more than a treadmill, adding an extra layer of functional benefit.

    For a complementary lower-body workout, you may also want to explore stair climbing, which pairs extremely well with incline walking sessions.

    Common Mistakes That Sabotage Results

    Incline walking is beginner-friendly, but there are some easy mistakes that can slow your progress — or lead to unnecessary strain.

    1. Holding onto the handrails the entire time. This is probably the most common error you’ll see on any gym floor. Gripping the handrails takes a significant load off your legs and core, essentially negating the incline’s benefit. It also puts your posture in a compromised position. Let your arms swing naturally. If balance is a concern at first, light fingertip contact is fine — but aim to wean off completely within two to three weeks.

    2. Going too steep, too fast. Jumping straight to 15% incline when you haven’t built the muscular and cardiovascular foundation for it often leads to calf tightness, Achilles tendon strain, and lower back soreness. Progress matters. Give your connective tissue time to adapt before increasing intensity. A conservative 2% increase per week is a smart baseline.

    3. Neglecting posture. Incline walking should keep you upright, with a slight forward lean from the ankles — not the waist. Hunching over or staring at your phone collapses your chest, reduces lung capacity, and places undue stress on your cervical spine. Keep your chin level, chest open, and core lightly engaged throughout your session.

    4. Skipping the warm-up and cool-down. Because incline walking targets the posterior chain intensely, tight hamstrings and calves are common side effects when you skip preparation. Always spend 5 minutes walking flat before increasing the incline, and finish with calf stretches, a hamstring stretch, and hip flexor work. For a complete stretching routine, consider pairing your sessions with a structured flexibility practice.

    5. Treating every session as max effort. More intensity is not always better. Consistent moderate-effort sessions tend to produce better long-term results than sporadic all-out efforts followed by days of soreness and missed workouts. Sustainability beats intensity over time.

    What to Eat to Support Your Incline Walking Routine

    You don’t need a complex diet overhaul to benefit from incline walking — but fueling your sessions thoughtfully will improve performance and recovery.

    According to the Academy of Nutrition and Dietetics, endurance-style cardio like incline walking benefits from a diet that prioritizes complex carbohydrates for sustained energy, adequate protein for muscle repair, and healthy fats for hormonal support.

    • Before your walk (30–60 minutes prior): A small, easily digestible snack works well — a banana with a tablespoon of almond butter, a handful of oats with berries, or a slice of whole-grain toast with avocado. Aim for roughly 20–30g of carbohydrates with a small amount of protein.
    • After your walk: Focus on protein to support muscle recovery. A meal containing 25–35g of protein within 90 minutes is a solid target. Eggs, Greek yogurt, grilled chicken, cottage cheese, or a quality protein shake are all practical options.
    • Hydration: The National Institutes of Health recommends drinking water consistently throughout the day — not just during workouts. For incline walking sessions over 30 minutes, aim for 6–8 oz of water every 15–20 minutes during exercise.
    • What to limit: High-sugar pre-workout snacks (candy, soda, sugary sports drinks) can cause an energy spike followed by a crash mid-session. Ultra-processed foods high in refined fats can also impair cardiovascular performance over time.

    If your goal includes weight management, the USDA Dietary Guidelines recommend building meals around vegetables, lean proteins, whole grains, and legumes — a framework that supports the caloric balance needed for sustainable fat loss when paired with consistent exercise.

    How Long Until You See Results? What to Track

    Setting realistic expectations is one of the most important things you can do when starting any new fitness habit. Results vary depending on your baseline fitness, consistency, diet, sleep quality, and stress levels — but here’s a general timeline based on available research:

    Weeks 1–2: You may notice improved breathing efficiency, slightly less fatigue on stairs or hills in daily life, and better sleep quality. These are real, meaningful changes — even if they’re not visible yet.

    Weeks 3–6: Cardiovascular improvements become more noticeable. Your heart rate at the same incline and speed will be lower, indicating improved fitness. Many people report increased daily energy and reduced afternoon fatigue during this window.

    Weeks 6–12: Visible changes in lower body muscle tone — particularly the glutes and hamstrings — often appear for those who are consistent 4–5 days per week. Body composition shifts may show up on measurements (waist circumference, clothing fit) before they show on the scale, which is completely normal and actually a sign of positive recomposition.

    What to track:

    • Resting heart rate (lower = better cardiovascular fitness)
    • Session heart rate at a fixed speed and incline (decreasing over time = fitness gain)
    • Duration you can sustain at target incline without holding the rails
    • Waist circumference, not just scale weight
    • How you feel on stairs, hills, and during daily activity

    When to reassess: If after 8 weeks of consistent effort (at least 3 sessions per week) you see no change in any tracked metric, it’s worth consulting a registered dietitian or certified personal trainer to review your program and nutrition. Sometimes a small adjustment makes a significant difference.

    Frequently Asked Questions

    Is incline walking better than running for fat loss?
    Not necessarily "better," but it can be more sustainable for many adults. Incline walking burns fewer calories per minute than running, but its low-impact nature means you can do it longer, more frequently, and with less recovery time. For those with joint sensitivity, the cumulative effect of consistent incline walking can rival or surpass inconsistent running. Results vary significantly based on individual factors.

    Can I do incline walking every day?
    Many people can, but rest or active recovery days are still valuable — especially when you’re increasing intensity. If your sessions are moderate (20–30 minutes at 6–10% incline), daily walking may be fine. For longer, steeper sessions, 1–2 rest days per week allows your posterior chain muscles to recover and adapt.

    Will incline walking build my glutes?
    It can contribute meaningfully to glute development, especially at steeper grades. The gluteus maximus is significantly more active during incline walking than flat walking. However, if significant glute hypertrophy is your primary goal, combining incline walking with dedicated resistance training — such as dumbbell training or kettlebell training — will produce faster and more pronounced results.

    What’s the best incline percentage to start with?
    For most beginners, starting at 4–6% is a practical and safe entry point. This is steep enough to increase heart rate and engage the posterior chain without overwhelming your calves or Achilles tendons. Increase by 1–2% every week or two based on how your body responds.

    Does incline walking help with back pain?
    For some people, yes — particularly those whose back pain stems from weak glutes and hamstrings (which is common). Strengthening the posterior chain through incline walking can reduce lumbar strain over time. However, if you currently have acute back pain or a diagnosed spinal condition, consult your healthcare provider before starting. This is highly individual and results vary.

    Conclusion

    Incline walking is one of those rare fitness tools that’s accessible enough for beginners, challenging enough for experienced exercisers, and gentle enough for people managing joint concerns — all at the same time. It doesn’t demand expensive equipment, extreme effort, or hours of your day.

    What it does demand is consistency. Thirty minutes at a meaningful incline, four days a week, over eight to twelve weeks, is a genuinely effective investment in your cardiovascular health, lower body strength, and long-term energy levels.

    Start where you are. Increase gradually. Keep your posture honest, leave the handrails alone, and trust the process. Your next step forward might literally be uphill — and that’s exactly the point.


    Wellness Disclaimer: This article is for informational and educational purposes only. The content is not intended to replace professional medical, nutritional, or fitness advice. Always consult a qualified healthcare provider, registered dietitian, or certified fitness professional before starting a new health program or making significant changes to your lifestyle.

    Content reviewed by our wellness editorial team, with references to peer-reviewed research and guidelines from leading health organizations.
  • Pilates for Adults: Build Strength, Flexibility & Balance

    Pilates for Adults: Build Strength, Flexibility & Balance

    You don’t have to be a dancer or a yoga devotee to benefit from Pilates — and once you understand what it actually does to your body, you may wonder why you waited so long to try it.

    Introduction

    Here’s a scenario a lot of people recognize: you’re not out of shape exactly, but something feels off. Your lower back aches after long days at the desk. Your posture has quietly collapsed. You feel stiff in the mornings, and no matter how many crunches you do, your core just doesn’t feel stable or strong.

    That’s where Pilates comes in — and it’s not what most people think. Pilates isn’t just stretching. It isn’t just for women or dancers. And it’s far from easy. According to the American College of Sports Medicine, Pilates is a legitimate form of resistance training that improves muscular endurance, core stability, and functional movement for adults across all fitness levels.

    In this guide, you’ll learn exactly how Pilates works, what the research says about its benefits, how to start safely, and what mistakes to avoid. Whether you’ve never set foot on a mat or you’re looking to deepen an existing practice, this is the practical starting point you’ve been looking for.


    Why Pilates Matters More Than You Think

    Most adults lose somewhere between 3 and 8 percent of their muscle mass per decade after age 30, according to research published in the Journal of Aging and Physical Activity. That gradual loss affects posture, balance, joint stability, and even metabolic health. The solution isn’t always lifting heavier — it’s building smarter, more intentional movement patterns.

    Pilates was originally developed by Joseph Pilates in the early 20th century as a rehabilitation system — what he called “Contrology” — for injured dancers and soldiers. Decades later, the method has been refined and validated by physical therapists, sports medicine professionals, and exercise scientists worldwide.

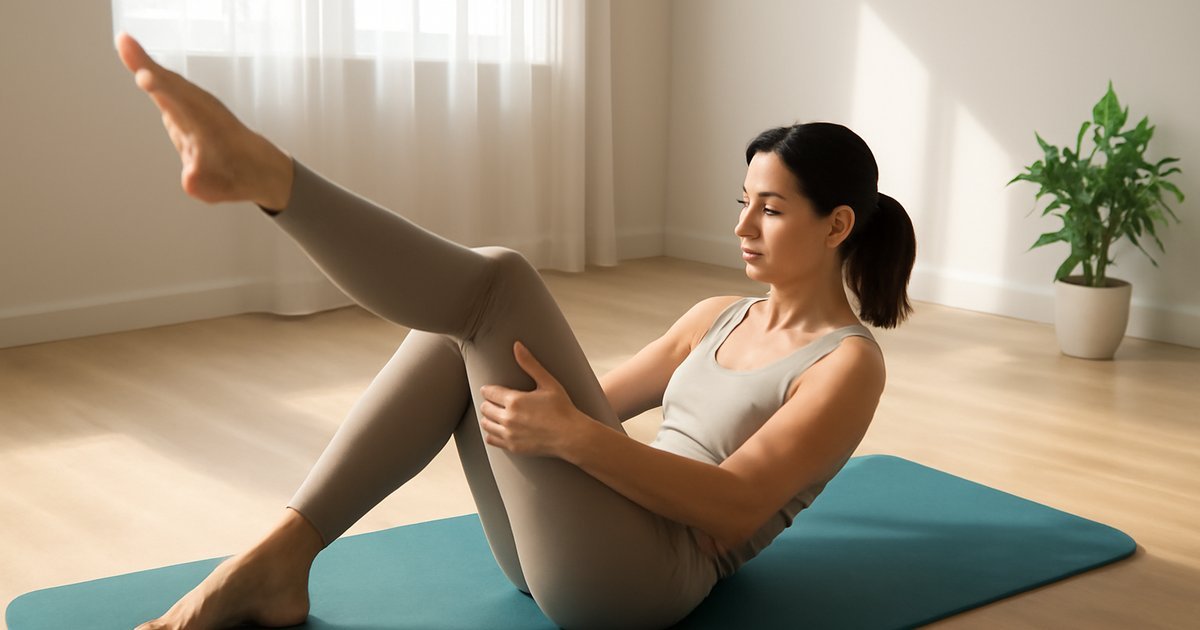
    What makes it uniquely valuable for busy adults is that it targets the deep stabilizing muscles that conventional gym workouts tend to ignore: the transverse abdominis, the multifidus, the pelvic floor, and the muscles around the shoulder girdle. These are the muscles that hold your spine upright, protect your joints, and allow you to move efficiently in daily life.

    A 2015 meta-analysis published in the Journal of Bodywork and Movement Therapies found that consistent Pilates practice significantly improved core strength, flexibility, and balance in healthy adults, with effects that showed up in as little as eight weeks of regular practice. That’s not a long time to see real, functional change in your body.

    The bottom line: Pilates isn’t a "soft" workout. It’s a precision-based training method that builds the kind of strength that actually improves how you feel and move every single day.


    The Science Behind How Pilates Works

    At its core — literally — Pilates is built around a concept called the "powerhouse." This refers to the group of muscles spanning the lower torso: the abdominals, lower back, hips, and glutes. Every Pilates movement is initiated from this center, which trains your nervous system to recruit deep stabilizers before larger muscle groups take over.

    This is fundamentally different from how most people exercise. In a standard gym session, you might use your larger, more dominant muscles — your quads, your upper traps, your hip flexors — while the smaller stabilizers remain underworked. Over time, this imbalance contributes to poor posture, joint pain, and movement inefficiency.

    Pilates corrects this by slowing movements down and demanding precise muscle engagement. You can’t cheat your way through a properly cued Pilates exercise. The method incorporates six foundational principles: concentration, control, center, flow, precision, and breath. Each one is designed to make your nervous system work harder than the load itself might suggest.

    Let’s bust a common myth: many people believe Pilates only develops "long, lean muscles" — a phrase repeated so often it’s practically folklore. Muscle shape is largely determined by genetics, not training style. What Pilates actually does is improve neuromuscular coordination, core endurance, joint mobility, and postural alignment. That’s not a marketing claim — it’s physiology.

    Research published in PLOS ONE (2016) demonstrated that Pilates training leads to measurable improvements in proprioception — your body’s sense of its own position in space. Better proprioception means better balance, fewer falls, and more efficient movement patterns across all physical activities. For adults in their 40s and 50s especially, this benefit is significant and underappreciated.

    Pilates also has meaningful implications for back health. The Mayo Clinic notes that low back pain affects up to 80% of adults at some point in their lives, and Pilates-based rehabilitation has become a standard recommendation from physical therapists for chronic lower back pain management. It’s not a cure, but it’s a well-supported adjunct to care.


    How to Get Started with Pilates

    Starting Pilates doesn’t require expensive equipment or a boutique studio membership. Here’s how to build in gradually, depending on where you’re starting from.

    Beginner Level

    1. Start mat-based. Mat Pilates requires only a non-slip exercise mat and a small amount of floor space. Begin with two to three 20-minute sessions per week, focusing on foundational exercises like the Hundred, single-leg stretches, and pelvic tilts.
    2. Prioritize breath. In Pilates, you inhale to prepare and exhale to execute effort. Learning this pattern before worrying about movement complexity will accelerate your progress dramatically.
    3. Use a qualified instructor or video guide for form feedback. Even one in-person session with a certified Pilates instructor can correct habits that self-study tends to miss. Look for instructors certified through the Pilates Method Alliance (PMA) or STOTT Pilates.
    4. Work on the Big 5 beginner moves: the Hundred, the Roll-Up, single-leg circles, rolling like a ball, and the single-leg stretch. These build the foundational body awareness the entire system depends on.

    Intermediate Level

    • Introduce Reformer Pilates, which uses a spring-resistance sliding carriage to add load and variety. Many gyms and studios offer Reformer classes that significantly increase muscular challenge.
    • Extend sessions to 40-50 minutes, three to four times per week.
    • Incorporate prop-based exercises using resistance circles (magic circles), light hand weights, or foam rollers to progressively challenge stability.

    Advanced Level

    • Combine mat and Reformer work with apparatus exercises on the Cadillac, Wunda Chair, or ladder barrel for full-system Pilates training.
    • Integrate Pilates principles into your other workouts — using the breath and core engagement cues during strength training or running can improve performance and reduce injury risk.

    If you enjoy training with your own bodyweight and want to pair Pilates with a complementary approach, our guide on Bodyweight Training: Build Real Strength Anywhere offers excellent foundational work that pairs well with a Pilates practice.


    Common Mistakes That Sabotage Your Pilates Results

    Even motivated adults run into predictable pitfalls when starting Pilates. Here are the most common ones — and how to fix them before they become habits.

    1. Holding your breath. This is the number one error beginners make. Breath is not optional in Pilates — it’s the mechanism that activates intra-abdominal pressure and protects the spine during movement. If you notice yourself holding your breath, slow down. Return to breath control before increasing complexity.

    2. Rushing through repetitions. Pilates is a slow-training system by design. Performing exercises quickly reduces muscle time under tension and bypasses the neuromuscular control the method is built to develop. Fewer, slower, better reps always outperform more, faster, sloppy ones.

    3. Leading with your neck during abdominal work. Many people unconsciously strain their neck forward during exercises like the Hundred or crunching movements. This recruits the sternocleidomastoid instead of the deep abdominals and can cause cervical strain. Fix: think about lengthening through the back of your skull, and keep your gaze toward your knees, not the ceiling.

    4. Treating it as a warm-up-only practice. Some people only do Pilates before "real" workouts, never giving it a full session of its own. While Pilates integrates beautifully with other training, dismissing it as supplementary means you’ll never develop the deep strength and coordination it can build on its own terms.

    5. Skipping consistency. Results from Pilates are cumulative. The neuromuscular changes that drive better posture and core stability take weeks of consistent practice to consolidate. Going twice a month won’t get you there. Two to three times per week, practiced consistently over eight to twelve weeks, is where the real transformation begins.


    What to Eat to Support Your Pilates Practice

    Pilates may not burn as many calories per session as a high-intensity interval workout, but it does demand muscular endurance, concentration, and recovery. Your nutrition should reflect that.

    Protein: The Academy of Nutrition and Dietetics recommends 1.2 to 1.7 grams of protein per kilogram of body weight for active adults. Prioritize lean sources like chicken, fish, eggs, Greek yogurt, legumes, and tofu to support muscle repair and adaptation. A 150-pound active adult should aim for roughly 82 to 115 grams of protein per day.

    Complex carbohydrates: Pilates sessions, especially longer or Reformer-based ones, require glycogen. Don’t undercut your training by going too low-carb. Whole grains, sweet potatoes, oats, and fruit are your best fueling choices before and after sessions.

    Anti-inflammatory foods: Since Pilates is often used for joint health and injury prevention, foods that support inflammation management are a smart addition. According to Harvard Health Publishing, omega-3 rich foods (salmon, walnuts, flaxseed), leafy greens, and berries help manage the inflammatory response tied to exercise and aging.

    Hydration: Even low-impact workouts drive fluid loss through breath and perspiration. The USDA Dietary Guidelines recommend at least 11.5 cups (women) to 15.5 cups (men) of total fluid daily. Drink 16 ounces of water about 90 minutes before your session and replenish afterward.

    What to avoid: Ultra-processed foods, excess sugar, and alcohol in the hours around your sessions can impair muscle recovery and concentration — two things Pilates demands. You don’t need to be perfect, but timing matters.


    How Long Until You See Results — and What to Track

    This is the question everyone wants answered honestly, and the answer is: it depends on your starting point, your consistency, and what results you’re measuring.

    Here’s what the research and clinical experience suggest:

    • Weeks 1-3: Body awareness increases. You’ll start to feel muscles you didn’t know were there. Expect some soreness in the deep abdominals, inner thighs, and mid-back — areas often underdeveloped in conventional training.
    • Weeks 4-6: Postural improvements often become noticeable. Colleagues or family may comment that you’re "standing taller." Mild back discomfort may begin to ease with consistent practice.
    • Weeks 8-12: Core endurance, balance, and flexibility show measurable gains. Research supports this timeline — the 2015 Journal of Bodywork and Movement Therapies meta-analysis noted statistically significant changes within this window.
    • Months 4-6+: Functional strength translates into other areas — better performance in other workouts, reduced injury frequency, improved posture under fatigue.

    What to track:

    • How long you can hold a plank with proper form (start and measure again at week 8)
    • Range of motion in forward fold and lateral spine flexion
    • Subjective back pain or stiffness levels on a 1-10 scale
    • Balance test: single-leg stance with eyes closed (aim for 10-20 seconds)

    If you’re not seeing any changes after 10-12 consistent weeks, consider booking a session with a certified Pilates instructor or physical therapist to evaluate your form and program design.

    Pilates pairs exceptionally well with low-impact cardio. If you’re looking to complement your mat work with joint-friendly aerobic training, check out our guide on Swim Training for Fitness: Your Complete Guide for a natural pairing that keeps your joints healthy while building cardiovascular endurance.


    Frequently Asked Questions About Pilates

    Is Pilates enough on its own as a complete fitness program?
    For many adults, especially those focused on injury prevention, rehabilitation, or improving daily movement quality, Pilates can serve as a primary fitness practice. However, the American College of Sports Medicine recommends that most adults also include aerobic exercise (150+ minutes per week at moderate intensity) for cardiovascular health. The best approach combines Pilates with some form of cardio, even walking.

    Can Pilates help with weight loss?
    Pilates can support weight management as part of a broader healthy lifestyle, but it’s not primarily a calorie-burning exercise. A 45-minute mat session burns roughly 175-250 calories depending on body weight and intensity — less than running or cycling. That said, improved body composition, muscle tone, and movement efficiency can support long-term weight management goals when combined with good nutrition and other movement.

    Is Pilates safe for people with back pain?
    For most adults with chronic low back pain, modified Pilates is considered safe and beneficial when guided by a qualified instructor. The Mayo Clinic notes that Pilates strengthens the muscles that support the lumbar spine, which often reduces chronic pain over time. However, always get clearance from your physician or physical therapist before starting, especially if you have a disc herniation, osteoporosis, or recent spinal surgery.

    Mat Pilates vs. Reformer Pilates — which is better?
    Neither is objectively superior — they serve different purposes. Mat Pilates is accessible, equipment-free, and excellent for building foundational body awareness. Reformer Pilates adds spring resistance, which increases the challenge significantly and allows for a wider range of exercises. Most practitioners benefit from both. Start with mat work to build your foundation, then explore Reformer training as you progress.

    How often should I do Pilates?
    Two to three sessions per week is the sweet spot for most adults looking to see consistent results without overtraining. Joseph Pilates famously said, "In 10 sessions you will feel the difference, in 20 you will see the difference, and in 30 you’ll have a whole new body." That quote reflects the cumulative, consistent nature of the practice — and it still holds up.


    Conclusion

    Pilates isn’t a trend. It’s a century-old, scientifically supported training method that happens to address some of the most common physical complaints of modern adult life: back pain, poor posture, weak core stability, and reduced mobility.

    You don’t need a boutique studio or expensive equipment to start. You need a mat, a commitment to showing up two or three times a week, and enough patience to let the method work its way through your nervous system over several weeks.

    Start simple. Master the breath. Feel the muscles you’ve been ignoring. Small, consistent reps of precise movement will outperform any workout you ever rush through. Your body — especially the parts that ache and feel tight — will thank you for it.

    Start today with 20 minutes on your mat. That’s it. That’s the whole first step.


    This article is for informational and educational purposes only. The content is not intended to replace professional medical, nutritional, or fitness advice. Always consult a qualified healthcare provider, registered dietitian, or certified fitness professional before starting a new health program or making significant changes to your lifestyle.

    Content reviewed by our wellness editorial team, with references to peer-reviewed research and guidelines from leading health organizations.
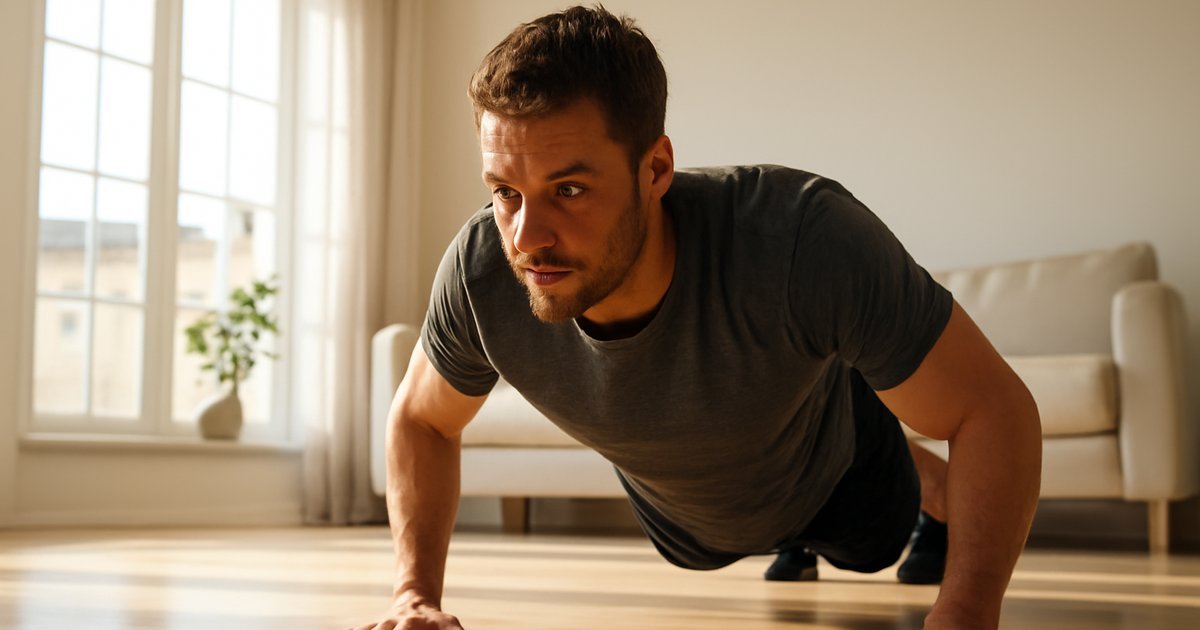
  • CrossFit-Style Training: A Complete Guide for Adults

    CrossFit-Style Training: A Complete Guide for Adults

    CrossFit-Style Training: A Complete Guide for Adults

    You don’t need to join a CrossFit box to train like one — but understanding how this approach works could completely change the way you think about fitness.

    Picture this: it’s 6 a.m., and instead of trudging through another mindless treadmill session, you’re moving through a fast-paced combination of squats, pull-ups, and kettlebell swings — heart pounding, muscles firing, done in under 30 minutes. That’s the allure of CrossFit-style training, and for millions of adults across the country, it’s become a game-changer.

    According to a report from the American College of Sports Medicine, high-intensity functional training consistently ranks among the top fitness trends for adults, and for good reason — it delivers results in less time, builds strength and cardiovascular endurance simultaneously, and rarely feels monotonous.

    But CrossFit-style workouts get a mixed reputation. Some people swear by them. Others write them off as extreme, injury-prone, or just not for them. The truth, as always, is more nuanced. This guide breaks down exactly how CrossFit-style training works, who it’s actually for, how to start safely, and what common mistakes to avoid — whether you’ve never done a burpee in your life or you’re ready to level up your current program.

    Why CrossFit-Style Training Matters More Than You Think

    Most adults over 30 are dealing with a slow, quiet decline in muscle mass, cardiovascular efficiency, and metabolic rate — even if they exercise regularly. Traditional steady-state cardio helps the heart, but does little for muscle retention. Traditional strength training builds muscle, but often neglects the cardiovascular system.

    CrossFit-style training addresses both simultaneously. It combines Olympic-style lifts, gymnastics movements, and metabolic conditioning into time-efficient, varied workouts that challenge your entire body and your aerobic system at once.

    Research published in the Journal of Strength and Conditioning Research found that participants who completed 10 weeks of high-intensity functional training significantly improved both VO2 max (a marker of cardiovascular fitness) and maximum strength — outcomes rarely seen together with a single training modality.

    For busy adults aged 25-60, this dual-adaptation potential is enormously practical. You’re not choosing between cardio day and lifting day — you’re getting both in a 20 to 45-minute session, several times a week.

    Beyond the efficiency angle, CrossFit-style training emphasizes movements that translate to real life — squatting, hinging, pressing, pulling, carrying. These aren’t just gym exercises. They’re the mechanics of everyday living, and training them keeps you capable, resilient, and independent as you age.

    How CrossFit-Style Training Actually Works

    Let’s clear something up first: you don’t have to be a CrossFit member, do official CrossFit programming, or compete in any capacity to train in this style. The methodology is the key, not the brand.

    CrossFit-style training is built around three core principles: constantly varied movements, functional patterns, and relative intensity. Workouts — often called WODs (Workouts of the Day) in CrossFit culture — combine elements from weightlifting, gymnastics, and metabolic conditioning into structured sessions that can be scaled to any fitness level.

    A common myth is that CrossFit is only for elite athletes or young, injury-free individuals. This is simply not true. Research from the International Journal of Exercise Science documented CrossFit participation across diverse age groups, finding that adults 40 and older not only completed programs safely with proper coaching but also reported high adherence rates — often outperforming younger participants in consistency.

    The real mechanism at play is metabolic conditioning, or "metcon." These workouts are structured to keep your heart rate elevated while moving through strength-based patterns, creating what researchers call excess post-exercise oxygen consumption (EPOC) — meaning your body continues burning energy at an elevated rate for hours after the workout ends.

    Common workout formats include:

    • AMRAP (As Many Rounds As Possible in a set time)
    • EMOM (Every Minute On the Minute — complete reps, rest the remainder)
    • For Time (complete a set number of reps as fast as possible)
    • Chipper (a long list of movements, completed once through)

    Each format challenges your fitness differently, which is exactly why results tend to come faster than with repetitive, single-modality training.

    How to Get Started: Practical Steps by Level

    Starting CrossFit-style training doesn’t mean jumping into an intense hour-long class on day one. The smart approach is progressive — and it applies whether you’re coming off the couch or already training several days a week.

    Step 1: Learn the foundational movements first. Before adding intensity or load, get comfortable with the air squat, deadlift hinge, push-up, row (with a band or cable), and hollow body hold. These are the building blocks of almost every CrossFit-style workout. Spend one to two weeks here if you’re new to training.

    Step 2: Start with EMOMs to control intensity. EMOM workouts are beginner-friendly because the rest is built in. Try: every minute for 10 minutes, do 10 air squats and 5 push-ups. Rest what remains. This gives you intensity without the chaos of open-ended workouts.

    Step 3: Introduce equipment gradually. A set of dumbbells, a pull-up bar, and a jump rope will cover most CrossFit-style movements at home. Resistance bands and a kettlebell expand your options significantly. For related equipment guidance, see our Dumbbell Training: The Complete Guide for Adults and Kettlebell Training: The Full-Body Workout You’re Missing.

    Beginner sample week (3 days):

    • Day 1: 10-min EMOM — 8 goblet squats + 6 push-ups
    • Day 2: Rest or light walk
    • Day 3: AMRAP 12 min — 10 dumbbell deadlifts, 10 sit-ups, 200m jog/row
    • Day 4: Rest
    • Day 5: For time — 3 rounds of 15 air squats, 10 dumbbell rows, 5 burpees

    Intermediate option: Add barbell movements (back squat, deadlift, overhead press) under proper coaching. Increase weekly volume to 4-5 sessions. Introduce timed benchmark workouts to track progress.

    Advanced option: Program Olympic lifting (clean, snatch), add gymnastics skills (pull-ups, toes-to-bar), and periodize intensity — using a hard week followed by a deload week for recovery.

    Common Mistakes That Sabotage Results

    CrossFit-style training is effective — but it’s also easy to approach incorrectly, especially when the culture emphasizes going hard and going fast. Here are the mistakes that derail the most well-intentioned adults:

    1. Sacrificing form for speed. CrossFit-style workouts are often timed, which creates an unconscious urge to rush. But speed without form leads to injury, not fitness. The fix: choose a weight and pace at which you can maintain technique for all reps, not just the first few. Slow down by 20% and you’ll often finish stronger and safer.

    2. Ignoring recovery. High-intensity functional training creates significant muscular demand. Doing intense sessions 5-6 days a week without adequate sleep or nutrition will not accelerate results — it will stall or reverse them. The American College of Sports Medicine recommends at least 48 hours of recovery between sessions targeting the same muscle groups. Build in intentional rest days or active recovery sessions like light walking or mobility work.

    3. Not scaling appropriately. Every CrossFit-style workout can and should be modified to match your current capacity. Using too much weight, skipping progressions, or performing movements you haven’t built a foundation for is the fastest route to burnout or injury. There is zero shame in scaling — even elite athletes do it when learning new skills.

    4. Treating every workout like a competition. This is especially common when training with others or following social media fitness accounts. Your workout is not your competition. Chasing other people’s times or loads ignores your unique recovery capacity, mobility, and training history. Train against yesterday’s version of yourself, not someone else’s best day.

    5. Neglecting strength progressions. CrossFit-style training can feel deceptively cardio-heavy. Without intentional progressive overload in your strength work, you’ll plateau. Apply the same logic outlined in structured strength programs — gradually increasing load, reps, or complexity over time.

    What to Eat to Support CrossFit-Style Training

    High-intensity functional training places meaningful demands on your energy systems and muscle tissue. Your nutrition needs to match that output.

    Protein is non-negotiable. The Academy of Nutrition and Dietetics recommends 1.2 to 2.0 grams of protein per kilogram of body weight for active adults engaged in resistance and high-intensity training. For a 160-lb adult, that’s approximately 87 to 145 grams per day. Prioritize complete protein sources: eggs, Greek yogurt, lean poultry, fish, cottage cheese, legumes, and tofu.

    Carbohydrates fuel your intensity. This is not the time for very low-carb approaches. Glycogen — stored carbohydrate — is the primary fuel for high-intensity work. According to the USDA Dietary Guidelines, active adults should obtain 45-65% of their calories from carbohydrates. Emphasize complex sources: oats, sweet potatoes, brown rice, quinoa, fruit, and whole grain bread.

    Pre-workout timing matters. A meal containing both carbohydrates and protein 1.5 to 2 hours before training supports performance and reduces muscle breakdown. If you train early and can’t eat a full meal, even 20-30 grams of carbs (a banana or small bowl of oats) can meaningfully improve output.

    Post-workout recovery window: Research from the Journal of the International Society of Sports Nutrition supports consuming 20-40 grams of protein and carbohydrates within 30-60 minutes post-workout to support muscle repair and glycogen replenishment. A simple option: Greek yogurt with fruit, a protein shake with a banana, or eggs on toast.

    Hydration: High-intensity training increases sweat loss significantly. Aim for at least half your body weight in ounces of water daily (e.g., 80 oz for a 160-lb person), more on training days. Electrolyte replacement is worth considering during sessions longer than 45 minutes.

    How Long Until You See Results — and What to Track

    One of the most motivating things about CrossFit-style training is how quickly some improvements become measurable. That said, results vary significantly based on your starting fitness level, consistency, nutrition, and sleep quality.

    Weeks 1-2: Neurological adaptations — your brain and nervous system become more efficient at coordinating the new movement patterns. You may feel stronger without much visible change. This is normal and important.

    Weeks 3-6: Cardiovascular improvements begin to show. Your recovery between sets gets faster, your heart rate returns to baseline more quickly, and workouts that felt impossible start feeling manageable. Research published in the Journal of Sports Medicine and Physical Fitness supports meaningful VO2 max improvements within 4-8 weeks of consistent high-intensity training.

    Weeks 6-12: Visible muscular changes, improved body composition, and measurable strength gains. This is where the compound effect of consistent training starts delivering noticeable results.

    What to track:

    • Workout performance — times, rounds, reps, and loads over time
    • Resting heart rate (a decreasing trend signals improved cardiovascular fitness)
    • How you feel at a perceived exertion level — are the same workouts feeling easier?
    • Recovery quality — are you sleeping better, feeling less sore after sessions?
    • Energy levels throughout the day

    If you’re not seeing improvements after 8-12 weeks of consistent effort, reassess your recovery habits, nutrition, and programming before adding more intensity. And if you experience persistent joint pain, seek guidance from a sports medicine physician or physical therapist before continuing.

    Frequently Asked Questions

    Is CrossFit-style training safe for adults over 40?
    Yes — with appropriate scaling and technique coaching. Adults over 40 benefit from the functional movement patterns, strength development, and cardiovascular conditioning this style offers. The key is progressing gradually, prioritizing mobility and form, and allowing adequate recovery between sessions. Results may take slightly longer to appear, but they are absolutely achievable.

    Do I need a gym to train this way?
    Not at all. Many CrossFit-style workouts can be performed with minimal equipment at home — dumbbells, a jump rope, resistance bands, and bodyweight movements cover the majority of functional training. Our Bodyweight Training guide shows how effective equipment-free training can be.

    How many days per week should I train in this style?
    Most beginners do well with 3 sessions per week, allowing full recovery between sessions. Intermediate trainees can progress to 4-5 days with proper periodization — alternating heavier strength days with lighter conditioning days. Training every day at high intensity is not recommended and typically leads to diminishing returns.

    Can I combine CrossFit-style training with other workouts?
    Absolutely. Many adults combine 2-3 CrossFit-style sessions with walking, yoga, swimming, or cycling for variety and active recovery. The key is managing total training volume so you’re not chronically overtaxing your recovery system. For ideas on complementary movement, check out our Swim Training for Fitness guide.

    Will CrossFit-style training make me bulky?
    This is one of the most persistent misconceptions in fitness. Building significant muscle mass requires very specific, sustained caloric surpluses and years of progressive overload. CrossFit-style training tends to produce a leaner, more defined physique — not bulk — because of the combination of strength work and high-intensity conditioning.

    Your Next Step Starts Today

    CrossFit-style training is one of the most efficient, adaptable, and genuinely motivating approaches to fitness available to adults. It doesn’t require elite athleticism, a gym membership, or an extreme commitment — just a willingness to move with intention and progress at your own pace.

    Start with three sessions this week. Pick one EMOM, one AMRAP, and one for-time workout from the beginner examples in this guide. Focus on form over speed, rest enough to recover fully, and fuel your body with the protein and carbohydrates it needs to adapt.

    Small, consistent steps — not perfect programming — are what build lasting fitness. Give this style of training 6 weeks of honest effort, and there’s a good chance it becomes the workout approach you actually look forward to.


    This article is for informational and educational purposes only. The content is not intended to replace professional medical, nutritional, or fitness advice. Always consult a qualified healthcare provider, registered dietitian, or certified fitness professional before starting a new health program or making significant changes to your lifestyle.

    Content reviewed by our wellness editorial team, with references to peer-reviewed research and guidelines from leading health organizations.
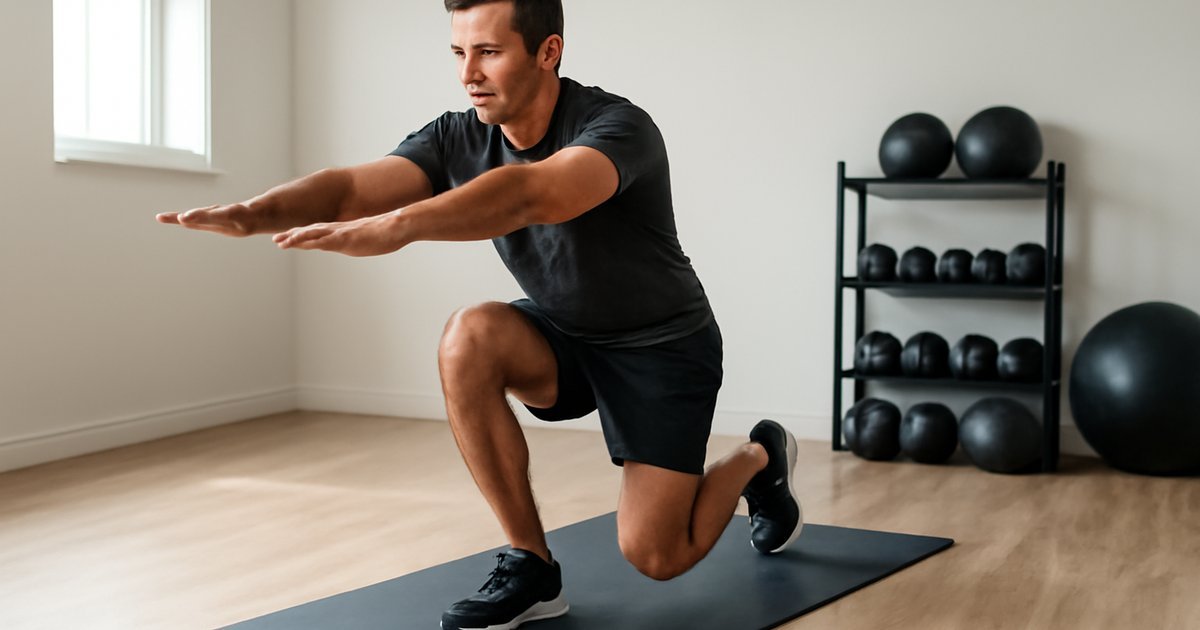
  • Bodyweight Training: Build Real Strength Anywhere

    Bodyweight Training: Build Real Strength Anywhere

    Bodyweight Training: Build Real Strength Anywhere

    No gym membership, no equipment, no excuses — just your body and a plan that actually works.

    Picture this: It’s 6:45 AM, your gym bag is still unpacked from last Tuesday, and the idea of driving across town before work feels genuinely impossible. Sound familiar? You’re not alone. According to the American College of Sports Medicine, one of the top reasons adults cite for skipping workouts is lack of time and access to a gym — not lack of motivation.

    Here’s the thing nobody tells you: some of the most effective training methods require zero equipment and can be done in your living room, backyard, or a hotel room. Bodyweight training — the practice of using your own body’s resistance to build strength, endurance, and mobility — has been backed by research as a legitimate, scalable approach to fitness for adults at every level.

    This guide will walk you through exactly how bodyweight training works, why the science supports it, how to get started safely, and what to avoid so you don’t spin your wheels. Whether you’re completely new to exercise or looking to fill the gaps between gym sessions, this is the approach that fits real life.

    Why Bodyweight Training Matters More Than You Think

    There’s a persistent myth in fitness culture that if you’re not lifting heavy iron, you’re not really building strength. That belief keeps a lot of people either overcommitting to gym routines they can’t sustain or doing nothing at all.

    Bodyweight training challenges that assumption directly. When performed with proper form, progressive difficulty, and intentional programming, exercises like push-ups, squats, lunges, and planks recruit multiple muscle groups simultaneously — creating what exercise scientists call compound movement patterns. These are the same foundational patterns used in barbell training.

    A study published in the Journal of Human Kinetics found that a structured 8-week bodyweight training program produced significant improvements in both muscular endurance and functional strength in previously sedentary adults. Participants trained three times per week with no equipment — and the results were comparable to resistance training with light weights.

    Beyond strength, bodyweight training supports joint health, improves coordination, builds body awareness (what coaches call proprioception), and enhances cardiovascular fitness when movements are sequenced with minimal rest. For adults aged 25-60, these benefits map directly onto daily quality of life: less back pain, better posture, more energy, and reduced injury risk during everyday activities.

    The American College of Sports Medicine recommends that adults engage in muscle-strengthening activities at least two days per week. Bodyweight training fully satisfies that guideline — and it removes every logistical barrier standing between you and consistency.

    The Science Behind How Bodyweight Training Builds Strength

    Understanding how this works will help you train smarter — not just harder.

    Muscle growth and strength development are driven by mechanical tension, metabolic stress, and muscle damage — three mechanisms that exercise physiologists have identified as core drivers of adaptation. You don’t need external load to trigger these responses. You need progressive overload: consistently challenging the muscle beyond what it’s accustomed to.

    With bodyweight training, progressive overload doesn’t come from adding weight plates. It comes from manipulating variables like lever length, range of motion, tempo, stability demands, and unilateral loading. A standard push-up is relatively easy for most people after a few weeks. A close-grip push-up is harder. An archer push-up harder still. A single-arm push-up — one of the most demanding upper-body exercises anyone can do — requires elite levels of strength and control.

    Common myth to bust: Many people assume bodyweight training is only useful for beginners and that you’ll quickly hit a ceiling. Research doesn’t support this. A 2019 review in the International Journal of Environmental Research and Public Health concluded that bodyweight resistance training is a viable strategy for improving muscle strength and endurance across a broad population, including trained athletes when exercise selection and progression are properly managed.

    The key insight: your body doesn’t know whether it’s pushing against a barbell or pushing against the floor. It responds to demand. Design your program to keep increasing the demand, and your body keeps adapting.

    One practical trade-off worth noting: bodyweight training has real limits for maximally loading certain muscle groups — particularly the posterior chain (hamstrings, glutes, and upper back). If hypertrophy (significant muscle mass gain) is your primary goal, you’ll eventually benefit from adding some external resistance. But for overall functional strength, body composition, and fitness, bodyweight training delivers impressive results for most adults.

    How to Get Started: A Practical, Level-Based Approach

    The most common mistake beginners make is jumping straight into advanced circuits they find on social media. Start where you actually are — not where you want to be.

    Step 1: Assess your baseline. Can you perform 10 standard push-ups with a straight body line? Can you squat to parallel with your heels on the floor? Can you hold a plank for 30 seconds without your hips sagging? These are honest starting points that tell you where to begin.

    Step 2: Master the foundational movement patterns first.

    • Push pattern: Push-ups (start with incline if needed)
    • Pull pattern: Inverted rows under a table, or jumping pull-ups with a controlled lower
    • Hinge pattern: Glute bridges, single-leg deadlift with bodyweight
    • Squat pattern: Bodyweight squats, then split squats, then Bulgarian split squats
    • Core stability: Dead bugs, hollow holds, side planks

    Beginner structure (weeks 1-4): 3 sessions per week, alternating push/pull and lower body focus. Aim for 2-3 sets of 8-12 reps per movement. Rest 60-90 seconds between sets. Focus entirely on form before adding reps.

    Intermediate option (weeks 5-12): Introduce more challenging variations — deficit push-ups, pistol squat progressions, pike push-ups for shoulders, single-leg glute bridges. Reduce rest periods to 30-45 seconds. Add a tempo element: 3 seconds down, pause, explode up.

    Advanced option: Archer push-ups, pseudo planche push-ups, shrimp squats, L-sits, and eventually front lever or back lever progressions. At this stage, bodyweight training is genuinely elite-level difficulty. If you want to add dumbbells or resistance bands to complement this work, check out the Dumbbell Training: The Complete Guide for Adults for a smart pairing approach.

    Common Mistakes That Sabotage Your Progress

    Even with the best intentions, most people make at least one of these errors. They’re easy to make — and just as easy to fix once you know what to look for.

    Mistake 1: Doing the same workout every single session. Your body adapts within 4-6 weeks. If you’re still doing the same push-up and squat combo from your first week three months later, you’ve hit an adaptation plateau. The fix: use periodization — rotate between strength-focused sessions (fewer reps, harder variations) and endurance-focused sessions (more reps, shorter rest).

    Mistake 2: Ignoring pulling movements. Most people default to push-dominant exercises — push-ups, dips, squats. But without adequate pulling work, you create muscular imbalances that can lead to shoulder dysfunction and poor posture. Inverted rows, resistance band pull-aparts, and doorframe rows are your friends here. This imbalance is especially common in adults who sit at desks all day.

    Mistake 3: Rushing through reps with poor form. Speed feels productive but undermines adaptation. Sloppy push-ups with flared elbows and a sagging core won’t build the chest, shoulders, and triceps you’re targeting — and they increase injury risk at the shoulder joint. Slow down. Record yourself occasionally. Form check against a standard.

    Mistake 4: Skipping recovery days. Muscle tissue repairs and grows during rest — not during the workout itself. Training every day without adequate recovery blunts your progress and raises cortisol levels, which Harvard Health Publishing links to increased fat storage around the midsection. Two to three rest or light-activity days per week is appropriate for most adults.

    Mistake 5: Not tracking progress. Without tracking, you won’t know if you’re improving — and that ambiguity kills motivation. Keep a simple training log: date, exercise, sets, reps, perceived effort. Watching yourself go from 5 push-ups to 20 over eight weeks is deeply motivating.

    What to Eat to Support Your Bodyweight Training

    Your training is only as effective as the fuel you give it. The Academy of Nutrition and Dietetics emphasizes that muscle protein synthesis — the process by which your body repairs and builds muscle tissue — requires adequate dietary protein distributed across the day.

    Protein: Aim for 0.7 to 1.0 grams of protein per pound of body weight daily if you’re actively training. Practical sources include eggs, Greek yogurt, cottage cheese, chicken breast, canned tuna, legumes, and tofu. Spreading intake across 3-4 meals is more effective than loading it all into one sitting, according to research in the Journal of the International Society of Sports Nutrition.

    Carbohydrates: Don’t fear them. Complex carbohydrates — oats, sweet potatoes, brown rice, fruits — fuel your workouts and replenish muscle glycogen afterward. The USDA Dietary Guidelines recommend that carbohydrates make up 45-65% of total daily calories for active adults.

    Healthy fats: Avocado, olive oil, nuts, and fatty fish support hormone production (including testosterone, which influences muscle synthesis) and reduce systemic inflammation. The American Heart Association recommends prioritizing unsaturated fats over saturated ones.

    Hydration: Even mild dehydration — 2% of body weight — can reduce exercise performance by up to 10%, according to the American College of Sports Medicine. Aim for at least half your body weight in ounces of water daily, more on heavy training days.

    Pre-workout: a small, balanced meal or snack 60-90 minutes before training works well for most people. Post-workout: protein within 2 hours supports recovery, though the “anabolic window” is more flexible than once believed.

    How Long Until You See Results — and What to Track

    Expect honest timelines here, because vague promises don’t help anyone.

    Weeks 1-2: Primarily neuromuscular adaptation — your nervous system learns to recruit muscles more efficiently. You may not look different, but you’ll feel stronger and more coordinated. This is real progress.

    Weeks 3-6: Visible improvements in endurance and rep counts. Some adults notice changes in muscle definition, especially with consistent nutrition. Energy levels often improve as a result of regular movement and better sleep quality.

    Weeks 8-12: Structural changes in muscle tissue become more apparent. Body composition may shift — less fat, more lean mass — even if the scale doesn’t change dramatically. This is normal and expected.

    Results vary significantly based on your starting point, sleep quality, stress levels, nutritional habits, and training consistency. Someone returning to exercise after a break will see faster initial gains than someone who has been active for years.

    Metrics to track: Reps completed per set, exercise variations unlocked (e.g., progressed from knee push-ups to full push-ups), resting heart rate over time, perceived exertion at a given workout intensity, and energy levels throughout the day.

    If you’ve been consistent for 12 weeks and feel stuck, consider consulting a certified personal trainer for a programming review. You can also explore complementary training modalities — suspension training, for example, is an excellent partner to bodyweight work. See our guide on Suspension Training: Build Strength with Your Own Body for ideas on how to combine these approaches.

    Frequently Asked Questions

    Can bodyweight training really build muscle, or is it just for toning?
    Yes, bodyweight training can build genuine muscle mass — especially in those new to resistance training or returning after a break. The key is progressive overload: consistently increasing difficulty through harder variations, slower tempos, or reduced rest. The concept of “toning” is largely a marketing term; what most people want is a combination of fat reduction and muscle development, both of which bodyweight training supports.

    How many days per week should I do bodyweight training?
    For most adults, three to four sessions per week with at least one rest day between strength sessions is an effective and sustainable frequency. The American College of Sports Medicine recommends at least two days of muscle-strengthening activity weekly. More is not always better — recovery is where the adaptation actually happens.

    Is bodyweight training safe for adults over 50?
    Generally, yes — and it’s often highly recommended. Bodyweight training is low-impact on the joints compared to heavy barbell work, making it accessible for adults experiencing joint sensitivity. That said, if you have pre-existing orthopedic conditions, osteoporosis, or cardiovascular concerns, consult your physician or a certified fitness professional before starting any new training program. Modifications exist for virtually every exercise.

    Do I need any equipment at all?
    Truly zero — for most of the foundational movements. A pull-up bar (door-mounted, under $30) expands your options significantly, especially for upper back development. A resistance band adds variety and is useful for assisted variations. But if you have nothing, a well-designed push-up, squat, hinge, and core routine is enough to produce real results.

    How is this different from yoga or Pilates?
    There’s overlap in the sense that all three use bodyweight and require no equipment. Bodyweight strength training is more explicitly oriented toward progressive resistance and muscle development. Yoga and Pilates emphasize flexibility, breath, and postural alignment more centrally. Many adults find that combining bodyweight strength training with mobility or yoga work produces excellent results — they’re complementary, not competing. You can also explore how Balance Training fits into a well-rounded routine.

    Your Next Step Starts Today

    Bodyweight training isn’t a compromise for when you can’t get to the gym. For many adults, it becomes the most consistent, sustainable, and genuinely enjoyable form of exercise they’ve ever found — precisely because the barrier to entry is so low that there’s no good reason to skip it.

    You don’t need to overhaul your entire schedule. Start with three sessions this week. Pick four movements — a push, a pull, a squat, and a core exercise. Do 3 sets of each. Track your reps. Show up again in two days.

    Small consistent steps beat ambitious but sporadic effort every single time. The body you want to build is built one honest workout at a time — and today is a perfectly good day to start.


    Wellness Disclaimer: This article is for informational and educational purposes only. The content is not intended to replace professional medical, nutritional, or fitness advice. Always consult a qualified healthcare provider, registered dietitian, or certified fitness professional before starting a new health program or making significant changes to your lifestyle.

    Author Line: Content reviewed by our wellness editorial team, with references to peer-reviewed research and guidelines from leading health organizations.
  • Balance Training: Build Stability and Move Better

    Balance Training: Build Stability and Move Better

    Balance Training: Build Stability and Move Better at Any Age

    Most people never think about their balance — until the day they almost fall reaching for something on a high shelf.

    Here is a number worth pausing on: according to the Centers for Disease Control and Prevention, falls are the leading cause of injury among adults over 65 — but the physical decline that makes falls more likely begins quietly in your 30s and 40s. By the time most people notice their stability slipping, years of preventable deterioration have already happened.

    Balance training is one of the most underrated categories in fitness. While gym culture obsesses over how much you can lift or how fast you can run, the ability to control your body in space — to stabilize, adjust, and move with precision — quietly determines your quality of life more than almost any other physical skill.

    The good news: balance is highly trainable at any age, and you do not need special equipment or hours of weekly practice to make meaningful progress. This guide breaks down exactly why balance training matters, how it works in your body, and how to start building it today — whether you are a complete beginner or already active and looking to fill a critical gap in your routine.

    Why Balance Training Matters More Than You Think

    Balance is not just a “senior fitness” concern. It is a foundational physical skill that affects every movement you make — from carrying groceries up the stairs to pivoting quickly during a recreational soccer game to simply standing on a moving subway without grabbing the rail.

    Research published in the British Journal of Sports Medicine found that the inability to stand on one leg for at least 10 seconds in midlife was associated with a nearly doubled risk of all-cause mortality over the following decade. That finding made headlines — and rightfully so. It suggests that balance capacity is not just about coordination; it reflects broader neuromuscular health, cardiovascular function, and even cognitive resilience.

    Beyond longevity markers, poor balance has very immediate consequences. It increases your risk of ankle sprains, knee injuries, and lower back pain during everyday activities. It also limits athletic performance: runners with poor single-leg stability tend to develop overuse injuries faster, and lifters with weak proprioception often compensate with problematic movement patterns that eventually cause joint stress.

    The American College of Sports Medicine (ACSM) recommends incorporating neuromotor exercises — which include balance, coordination, and agility training — at least two to three days per week for adults. Yet this category is consistently skipped in most self-designed fitness programs.

    How Balance Actually Works in Your Body

    Understanding balance means understanding three systems that your body integrates constantly without your awareness: your visual system, your vestibular system (the inner ear), and your proprioceptive system (nerve receptors in your muscles, joints, and tendons).

    Your proprioceptive system is particularly relevant to training. These sensory receptors detect changes in body position and muscle tension, sending real-time data to your brain so it can make micro-adjustments to keep you upright and stable. When you are sedentary or move in predictable, limited patterns — like sitting at a desk for eight hours — these receptors get less stimulation, and their signaling becomes slower and less precise.

    A common myth is that balance is mostly a core strength issue. While a strong core certainly helps, research from the Journal of Strength and Conditioning Research shows that balance deficits are often driven by poor ankle stability, weak hip abductors, and slow neuromuscular reaction time — not just weak abdominals. This is why targeted balance training produces results that generic core work simply cannot replicate.

    Another misconception: that balance declines are inevitable with age. Proprioceptive ability does decrease naturally over time, but studies consistently show that this decline is dramatically slowed — and in many cases partially reversed — with consistent balance-specific training. Your nervous system retains significant plasticity well into your 60s and beyond.

    How to Get Started: A Practical Balance Training Plan

    Balance training does not require a fancy gym setup. Most of the most effective drills use only your bodyweight, a sturdy chair for support when needed, and a small amount of floor space. Here is how to approach it by level:

    Beginner (Weeks 1-4): Build the Foundation

    • Single-leg stand: Stand near a wall or chair. Lift one foot slightly off the floor and hold for 10-20 seconds. Switch sides. Do 3 sets per side. Progress by closing your eyes once this feels stable.
    • Heel-to-toe walk (tandem walk): Walk in a straight line placing one foot directly in front of the other, heel touching toe. Do 10-15 steps forward and backward.
    • Weight shifts: Stand with feet hip-width apart. Slowly shift your weight fully onto your right foot, hold for 3 seconds, then shift left. Repeat 10 times each side.
    • Sit-to-stand without hands: From a chair, stand up and sit down slowly without using your arms. This builds functional lower-body stability. Aim for 10 slow reps.

    Intermediate (Weeks 5-10): Add Instability and Movement

    • Single-leg deadlift (bodyweight): Hinge forward at the hips while lifting one leg behind you, keeping your back flat. Return to standing. Do 8-10 reps per side.
    • Lateral band walks: With a resistance band around your ankles, step sideways for 10-15 steps in each direction. This targets hip abductors critical for lateral stability.
    • Balance board or BOSU ball stands: Perform single-leg stands or squats on an unstable surface. Start with two legs on the BOSU before progressing to one.
    • Stability ball exercises: Wall squats with a stability ball, or seated core work on a ball, force constant balance adjustments.

    Advanced (Weeks 10+): Dynamic and Multi-Planar Challenges

    • Single-leg squat (pistol squat progressions): These require full lower-body strength plus exceptional balance and ankle mobility.
    • Plyometric landing drills: Jump from two feet and land on one, holding the landing position for 3 seconds before releasing. This trains reactive stability.
    • Agility ladder drills: Lateral and diagonal footwork patterns train fast, multi-directional balance adjustments.

    Training frequency: Two to three sessions per week is sufficient for most adults. Each session can be as short as 10-15 minutes when added to an existing workout, or up to 30 minutes as a standalone session.

    Common Mistakes That Sabotage Your Progress

    Balance training sounds simple — and that simplicity is what causes people to do it incorrectly or inconsistently. Here are the most common errors and how to correct them:

    1. Rushing through holds to "finish" faster
    Balance training requires sustained neurological engagement. When you rush a single-leg hold to get it done, you bypass the proprioceptive challenge that makes the drill effective. Slow down deliberately. A 20-second controlled hold is far more valuable than a 5-second wobbly one.

    2. Only training balance in one plane of motion
    Most beginners do all their balance work in the sagittal plane — front to back. But real-life balance demands lateral (side-to-side) and rotational stability too. Include lateral step-ups, cross-body reaches, and rotational drills to build three-dimensional stability.

    3. Skipping it when "real" workouts are scheduled
    Because balance training does not produce visible muscle or significant caloric burn, it gets deprioritized. But this is exactly the training gap that leads to injury during those "real" workouts. Even 10 minutes of balance work at the end of a strength or cardio session compounds significantly over months.

    4. Using too much support too soon
    Holding a wall or chair is appropriate for beginners, but many people never progress past it. Challenge yourself to reduce support gradually — fingertips only, then no contact — so your neuromuscular system actually has to work.

    5. Ignoring footwear and surface
    Doing balance drills in thick, cushioned shoes reduces sensory feedback to your feet and ankles. Whenever safe, train barefoot or in minimal footwear to maximize proprioceptive input. This is one of the fastest ways to accelerate progress.

    Supporting Balance with the Right Nutrition and Lifestyle Habits

    Balance training is a neuromuscular activity — and your nervous system needs specific nutritional support to function at its best.

    Magnesium: This mineral plays a key role in nerve signal transmission and muscle function. The NIH notes that many US adults fall short of the recommended 310-420 mg per day. Food sources include dark leafy greens, almonds, pumpkin seeds, and black beans.

    Vitamin D: Research published in the Journal of the American Geriatrics Society has linked low vitamin D levels to impaired neuromuscular function and increased fall risk. The USDA Dietary Guidelines recommend 600-800 IU daily, though many adults — especially those in northern climates or with limited sun exposure — may need more. A healthcare provider can assess your levels.

    Protein: Muscle tissue supports joint stability, and adequate protein intake preserves the muscle mass that your balance depends on. The Academy of Nutrition and Dietetics recommends 0.8 grams per kilogram of body weight as a minimum for sedentary adults, with active adults benefiting from 1.2 to 1.6 grams per kilogram.

    Hydration: Even mild dehydration impairs proprioceptive sensitivity and reaction time, according to research from the Journal of Athletic Training. Aim for at least half your body weight in ounces of water daily as a general baseline, adjusting for sweat and activity level.

    Sleep is equally critical. During deep sleep stages, your brain consolidates motor learning — including the neuromuscular patterns you are training during balance work. Poor sleep does not just leave you tired; it actively slows the adaptation process.

    You may also want to explore complementary training modalities that naturally include balance challenges. Kettlebell training requires dynamic stability with every swing and press, while suspension training forces constant trunk and joint stabilization due to the instability of the straps. Both make excellent complements to dedicated balance work.

    How Long Until You See Results — and What to Track

    Balance improvements follow a predictable timeline, though individual results vary based on your starting point, age, and training consistency.

    Weeks 1-2: Neurological adaptation begins. You may notice you feel more coordinated on exercises you have been doing, even if single-leg holds still feel wobbly. This early improvement is largely about your nervous system learning, not muscular change.

    Weeks 3-6: Single-leg hold time typically improves noticeably. Many people who started at 5-8 seconds reach 20-30 seconds by week six with consistent practice.

    Weeks 8-12: Functional carry-over becomes apparent. People often report feeling steadier on stairs, more confident during hiking or recreational sports, and less prone to ankle rolls during casual movement.

    Metrics worth tracking:

    • Single-leg hold time (eyes open and closed) — test and record monthly
    • Number of balance corrections per set (aim for fewer over time)
    • Confidence on unstable surfaces (subjective, but meaningful)
    • Frequency of minor stumbles or near-misses in daily life

    If you are not seeing improvement after 8-10 weeks of consistent training, consider consulting a physical therapist. Some balance deficits are linked to vestibular disorders, peripheral neuropathy, or hip and ankle dysfunction that benefit from clinical evaluation and personalized programming. Also consider complementing your training with low-impact cardio like rowing machine workouts, which build lower-body endurance that supports stability.

    Frequently Asked Questions

    Can balance training help with lower back pain?
    In many cases, yes. Poor lumbar-pelvic stability is a common contributor to chronic low back pain, and balance training strengthens the deep stabilizing muscles of the spine and hips. Research from the Journal of Physical Therapy Science found that balance and proprioception training significantly reduced pain and disability in adults with nonspecific low back pain. That said, results vary, and if your back pain is severe or radiating, see a healthcare provider first.

    Is balance training safe if I have knee or ankle problems?
    Generally, yes — and it is often specifically recommended as part of rehabilitation for these joints. Improved proprioception around the knee and ankle reduces compensatory stress and can speed recovery. However, beginners with joint issues should start with very low-challenge drills using support and progress slowly. Working with a physical therapist to design an appropriate program is strongly advised in this case.

    How is balance training different from core training?
    They overlap but are not the same. Core training focuses on strengthening the muscles of your trunk. Balance training targets the entire neuromuscular system — including your feet, ankles, hips, and visual-vestibular integration. You can have a strong core and still have poor balance, particularly in lateral or dynamic scenarios. Both are valuable and work best together.

    Do I need a balance board or BOSU ball to see results?
    Not at all. Research shows that bodyweight balance drills on flat surfaces produce significant gains, especially for beginners and intermediate trainees. Unstable surfaces add challenge for advanced users but are not necessary for meaningful progress. Save the equipment investment until you have mastered stable-surface fundamentals.

    How do I fit balance training into a busy schedule?
    The most effective approach for busy adults is to attach balance drills to existing habits. Do single-leg stands while brushing your teeth. Add heel-to-toe walks during a phone call. Spend the first 10 minutes of any strength session on balance work before lifting. Small, consistent doses accumulate faster than you expect.

    Start Small, Stay Consistent, Move Better

    Balance training will not give you the adrenaline rush of a heavy lifting session or the endorphin flood of a long run. What it will give you — quietly, consistently, over weeks and months — is something more foundational: the ability to move through your life with control, confidence, and resilience.

    Start with one drill today. A 20-second single-leg stand while you wait for your coffee to brew. A slow, deliberate tandem walk down your hallway. It sounds small because it is — and that is exactly the point. The smallest consistent action is infinitely more powerful than the perfect program you never start.

    Your balance is a skill. Train it like one.


    This article is for informational and educational purposes only. The content is not intended to replace professional medical, nutritional, or fitness advice. Always consult a qualified healthcare provider, registered dietitian, or certified fitness professional before starting a new health program or making significant changes to your lifestyle.

    Content reviewed by our wellness editorial team, with references to peer-reviewed research and guidelines from leading health organizations.

  • Indoor Cycling: The Complete Fitness Guide for Adults

    Indoor Cycling: The Complete Fitness Guide for Adults

    Indoor Cycling: The Complete Fitness Guide for Adults

    You don’t need a fancy gym or a perfect fitness base — just a bike, a goal, and the right plan to make every pedal stroke count.

    Picture this: it’s 6:30 a.m., the gym is packed, and you’re not exactly thrilled about waiting for a treadmill. Then someone walks past you into the spin studio, clips in, and within minutes is completely locked in — no distractions, just rhythm, resistance, and real effort. You think, maybe I should try that.

    Indoor cycling — whether on a traditional spin bike, a studio class bike, or a connected smart trainer — has become one of the most consistently popular cardio formats among US adults. And for good reason. It’s low-impact, scalable to any fitness level, and delivers meaningful cardiovascular and metabolic benefits without destroying your joints.

    But like any training method, getting the most out of indoor cycling requires more than just hopping on and pedaling. In this complete guide, you’ll learn the science behind why it works, how to start smart, what mistakes to avoid, and how to track real progress over time.

    Why Indoor Cycling Matters More Than You Think

    Cardiovascular disease remains the leading cause of death in the United States, according to the American Heart Association. Yet only about 23% of American adults meet the federal guidelines for both aerobic and muscle-strengthening activity. The gap between knowing we should exercise and actually doing it consistently is enormous — and often, the barrier is joint pain, intimidation, or boredom.

    Indoor cycling addresses all three. Because the bike supports your body weight, there’s minimal stress on the knees, hips, and ankles compared to running or jumping. That makes it accessible for adults returning from injury, those managing mild osteoarthritis, or anyone who simply finds high-impact cardio unsustainable long-term.

    A study published in the Journal of Exercise Physiology found that participants who completed an eight-week indoor cycling program showed significant improvements in VO2 max, resting heart rate, and body composition — without the injury rates typically associated with high-intensity training. That’s a meaningful combination of outcomes.

    Beyond the physical metrics, indoor cycling is also mentally engaging. The structured nature of interval-based rides, the music, the coaching cues (in class formats), and the measurable feedback on resistance and cadence give your brain something to work with — which helps with adherence over time.

    The Science Behind Indoor Cycling and How It Actually Works

    Indoor cycling is primarily an aerobic exercise, but what makes it powerful is its ability to move fluidly between aerobic and anaerobic zones depending on how you adjust resistance and cadence. This is the foundation of its metabolic value.

    When you pedal at moderate resistance and a steady cadence, you’re training your aerobic energy system — improving heart efficiency, mitochondrial density, and fat oxidation. When you spike the resistance or sprint, you push into anaerobic territory, recruiting fast-twitch muscle fibers and triggering hormonal responses that support muscle development and post-exercise calorie burn.

    One common myth worth busting: many people believe indoor cycling is only for cardio and won’t build any muscle. That’s not accurate. Consistent cycling at higher resistance engages the quadriceps, hamstrings, glutes, and calves in ways that produce meaningful muscular endurance and, over time, hypertrophic adaptations — especially in beginners and intermediates. Research from the International Journal of Sports Physiology and Performance supports that resistance-based cycling improves lower-body muscular strength alongside aerobic capacity.

    Heart rate zones matter significantly in indoor cycling. The American College of Sports Medicine (ACSM) recommends training across multiple zones for well-rounded cardiovascular development. Zone 2 work (roughly 60–70% of max heart rate) builds your aerobic base, while Zone 4–5 intervals drive peak performance gains. A well-designed indoor cycling session typically incorporates both.

    If you’re interested in understanding Zone 2 cardio more deeply, this guide on rowing machine workouts covers overlapping cardiovascular principles with a different equipment focus.

    How to Get Started: From First Ride to Real Consistency

    Starting indoor cycling doesn’t require a boutique studio membership or a $2,000 connected bike. What it does require is a proper setup and a realistic plan.

    Step 1: Get your bike fit right
    Before your first ride, adjust the seat height so there’s a slight bend in your knee at the bottom of the pedal stroke — roughly 25 to 35 degrees. Set the handlebar height at or slightly above seat level to reduce lower back strain. A poor fit is one of the most common sources of discomfort for new riders.

    Step 2: Start with 20–30 minute sessions
    For beginners, three sessions per week at 20–30 minutes each is an appropriate starting point. Don’t rush to 60-minute rides. Building cardiovascular base and saddle comfort takes time — typically two to four weeks before longer sessions feel natural.

    Step 3: Learn cadence and resistance basics
    Cadence refers to pedal revolutions per minute (RPM). For most structured rides, a comfortable cadence falls between 80–100 RPM on flat efforts and 60–75 RPM during climbs with heavier resistance. Use resistance as your primary intensity lever — not just speed.

    Step 4: Follow a structured format
    A basic beginner session might look like this:

    • 5-minute warm-up at low resistance (70–80 RPM)
    • 15–20 minutes of steady-state moderate effort (80–85 RPM, moderate resistance)
    • 5-minute cooldown with gradual resistance reduction

    Intermediate option: Introduce 30-second resistance intervals every 3–4 minutes during the main block. This begins incorporating anaerobic stimulus without overwhelming your system.

    Advanced option: Structure rides using heart rate zones or power output (watts, if your bike measures it). Pyramid intervals, lactate threshold work, and sprint repeats become the focus at this stage.

    Common Mistakes That Sabotage Your Indoor Cycling Results

    Most people who plateau or quit indoor cycling aren’t failing because of effort — they’re failing because of a few fixable errors. Here are the ones that come up most often.

    Mistake 1: Riding at the same intensity every session
    This is sometimes called "junk miles" — moderate effort that never challenges your system enough to drive adaptation. If every ride feels roughly the same, your body stops responding. Fix this by deliberately varying intensity: some rides should feel easy (Zone 2 recovery), others should feel genuinely hard (Zone 4–5 intervals). Varying the stimulus is the entire point.

    Mistake 2: Ignoring saddle discomfort instead of fixing it
    Soreness in the first week is normal — your sit bones are adapting. But persistent discomfort after two weeks usually signals a fit problem or the wrong saddle. Padded cycling shorts make a significant difference. Don’t white-knuckle through pain that has a simple solution.

    Mistake 3: Skipping the warm-up
    Jumping into high-resistance efforts without a proper warm-up increases injury risk and reduces performance. Research published in the Journal of Strength and Conditioning Research consistently shows that a 5–10 minute aerobic warm-up improves subsequent performance output and reduces muscle strain. It’s not optional — it’s part of the session.

    Mistake 4: Relying solely on indoor cycling for fitness
    Indoor cycling is excellent cardio but doesn’t address upper body strength or functional movement patterns. Pairing it with two days of resistance training per week — even bodyweight work — creates a more complete fitness foundation. If you’re curious about equipment-based resistance options, this dumbbell training guide is a strong complement to a cycling program.

    Mistake 5: Not fueling appropriately
    For rides under 45 minutes, you likely don’t need to eat beforehand. But for sessions of 60 minutes or more, going in underfueled leads to early fatigue and poor performance. A small carbohydrate-containing snack (banana, toast with nut butter) 45–60 minutes before longer rides supports sustained output.

    Nutrition to Support Your Indoor Cycling Training

    You can’t out-ride a poor diet — and the right nutritional approach can meaningfully improve your performance and recovery on the bike.

    Carbohydrates: Cycling is a carbohydrate-dependent activity, particularly at moderate to high intensities. The Academy of Nutrition and Dietetics recommends that active adults consuming regular cardio training prioritize complex carbohydrates — oats, sweet potatoes, whole grain bread, rice — as primary fuel sources. Aim for roughly 45–65% of daily calories from carbohydrates if cycling is a consistent part of your week.

    Protein: Recovery starts with protein. Muscle repair and adaptation require adequate protein intake — approximately 1.2 to 1.6 grams per kilogram of body weight daily for active adults, per the ACSM. Prioritize high-quality sources like eggs, chicken, Greek yogurt, legumes, and fish in your post-ride meals.

    Hydration: Sweat rates on a stationary bike can be surprisingly high due to limited airflow. Harvard Health Publishing notes that even mild dehydration (1–2% body weight) can reduce endurance performance and increase perceived effort. Drink 16–20 oz of water in the two hours before a session, and sip regularly during rides longer than 30 minutes.

    What to avoid: Heavy, high-fat meals within 90 minutes of riding tend to cause GI discomfort and sluggish performance. Alcohol the night before a high-intensity session disrupts sleep quality and blunts recovery — both of which directly impact next-day performance.

    How Long Until You See Results — and What to Track

    Realistic expectations are the foundation of long-term consistency. Here’s what the research and practical experience suggest:

    Weeks 1–2: You’ll notice improved breathing efficiency and reduced perceived effort at the same intensity. This is your cardiovascular system adapting. Muscle soreness in the glutes and quads is normal.

    Weeks 3–4: Aerobic capacity measurably improves. Most beginners can sustain longer efforts with less fatigue. Sleep quality often improves during this window as well, which compounds recovery.

    Weeks 6–8: Body composition changes begin to show — particularly if nutrition is aligned. Research from the Journal of Exercise Physiology found meaningful reductions in body fat percentage after eight weeks of structured cycling. Results vary significantly based on starting fitness, frequency, and dietary habits.

    What to track:

    • Resting heart rate (lower over time = improved cardiovascular fitness)
    • Average heart rate during the same standardized session
    • Perceived exertion at a fixed resistance/cadence combination
    • Session duration and weekly volume
    • Recovery time after high-intensity intervals

    If you’ve been riding consistently for 8–10 weeks without noticeable improvement in any of these markers, that’s a signal to reassess your program — or speak with a certified fitness professional about periodization.

    Frequently Asked Questions

    Is indoor cycling good for weight loss?
    Indoor cycling can support weight loss as part of a broader approach that includes appropriate nutrition and a modest caloric deficit. A 45-minute moderate-to-vigorous cycling session can burn 400–600 calories depending on body weight and intensity, according to Mayo Clinic estimates. However, exercise alone — without dietary awareness — rarely produces significant fat loss.

    How many days a week should I cycle indoors?
    For general fitness, three to four sessions per week is an effective range for most adults. ACSM recommends at least 150 minutes of moderate-intensity aerobic activity weekly — three 50-minute sessions or four 40-minute sessions would meet this. Allow at least one recovery day between intense sessions.

    Will indoor cycling hurt my knees?
    When set up correctly, indoor cycling is one of the most knee-friendly cardio modalities available. Improper seat height is the primary culprit behind knee discomfort. If pain persists beyond setup correction, consult a sports medicine provider or physical therapist before continuing.

    Can I build muscle with indoor cycling alone?
    You can develop meaningful muscular endurance in the lower body — particularly the quads, glutes, and hamstrings — through resistance-based cycling. However, for significant hypertrophy or upper body strength, pairing cycling with resistance training produces far better overall results. Consider exploring kettlebell training as a complementary strength option.

    Do I need special shoes for indoor cycling?
    Not necessarily. Many spin bikes accommodate standard athletic shoes in caged pedals. Cycling-specific shoes with cleats that clip into SPD or Look Delta pedals improve power transfer and foot stability, which can be worthwhile if you’re riding three or more times per week. It’s an upgrade, not a requirement to start.

    Your Next Step Starts With One Ride

    Indoor cycling is one of the most accessible, joint-friendly, and genuinely effective cardio tools available to adults who want to build real cardiovascular fitness without grinding through workouts that hurt. The science supports it. The flexibility suits busy schedules. And the learning curve is manageable — even if your first ride leaves your legs shaking a little.

    You don’t need to be fit to start. You need to start to get fit. Whether you’re joining a studio class, setting up a bike at home, or using a connected smart trainer, the fundamentals here give you everything you need to ride smarter from day one.

    Pick your first session, set up your bike properly, and just ride. Consistency built over weeks beats intensity burned out in days — every single time.


    Wellness Disclaimer: This article is for informational and educational purposes only. The content is not intended to replace professional medical, nutritional, or fitness advice. Always consult a qualified healthcare provider, registered dietitian, or certified fitness professional before starting a new health program or making significant changes to your lifestyle.

    Author Line: Content reviewed by our wellness editorial team, with references to peer-reviewed research and guidelines from leading health organizations.